Author: jé judson

  • Building an Herb Spiral

    Building an Herb Spiral

    Last month I was researching accessible entry points into permaculture (because I find it a bit intimidating) and I stumbled across a presentation that highlighted herb spirals as a foodscaping design feature.

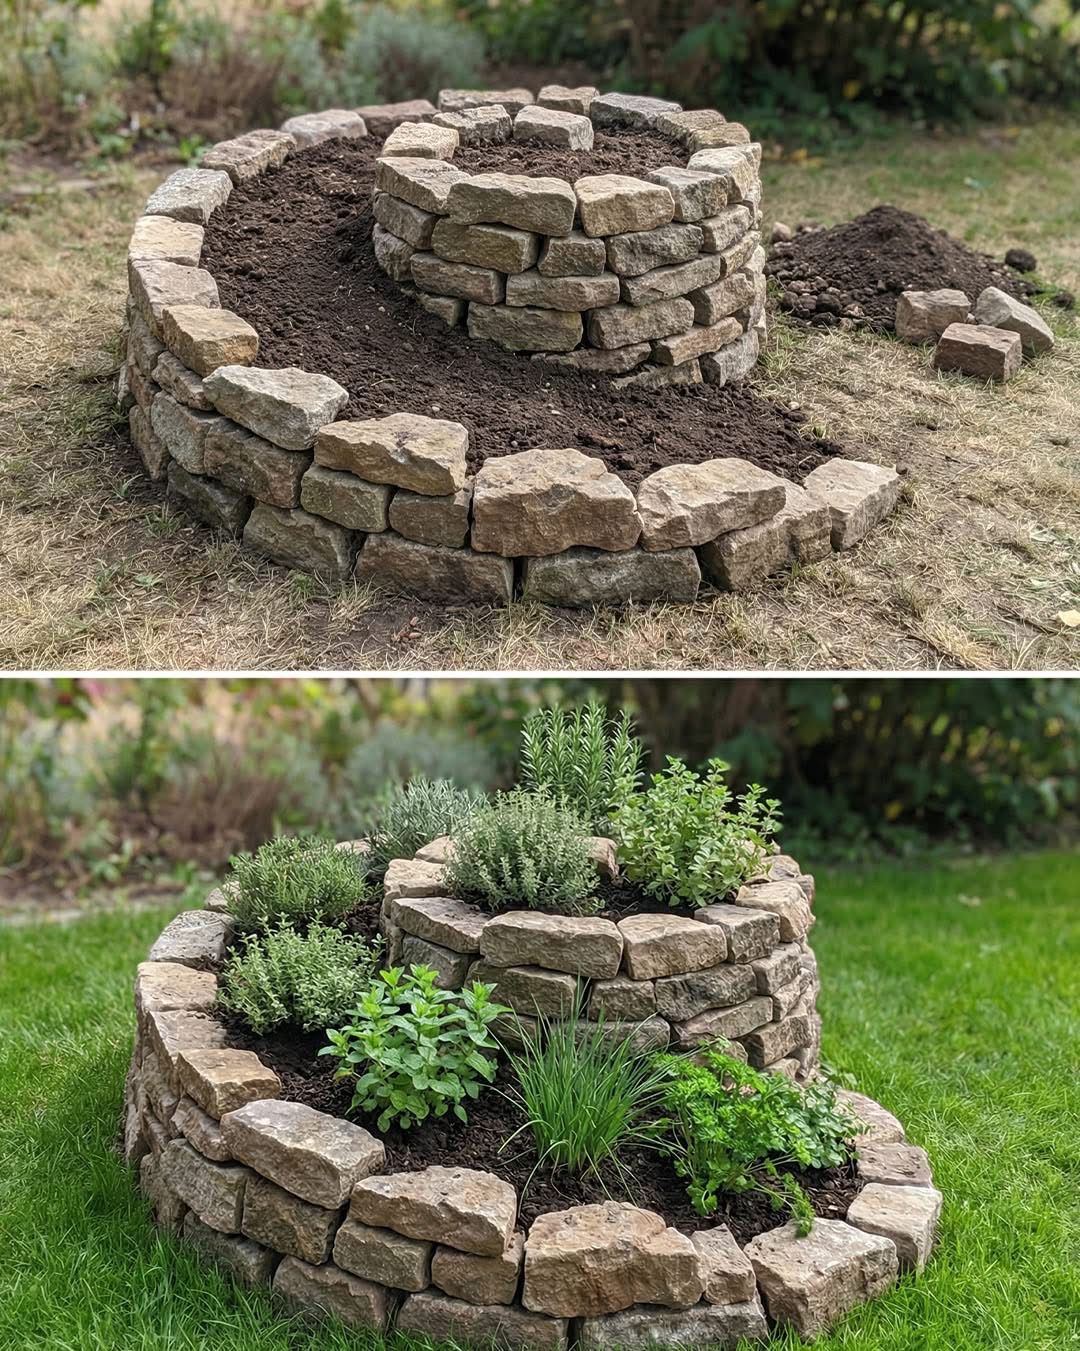
    An herb spiral is a circular structure that maximizes a relatively small spatial area by building vertically in a gradual winding ramp up to the center of the circle. Beyond the spatial benefits, the vertical spiral design creates multiple microclimates that create more growing ideal conditions for a variety of herbs within that space than if it were a flat planting area.

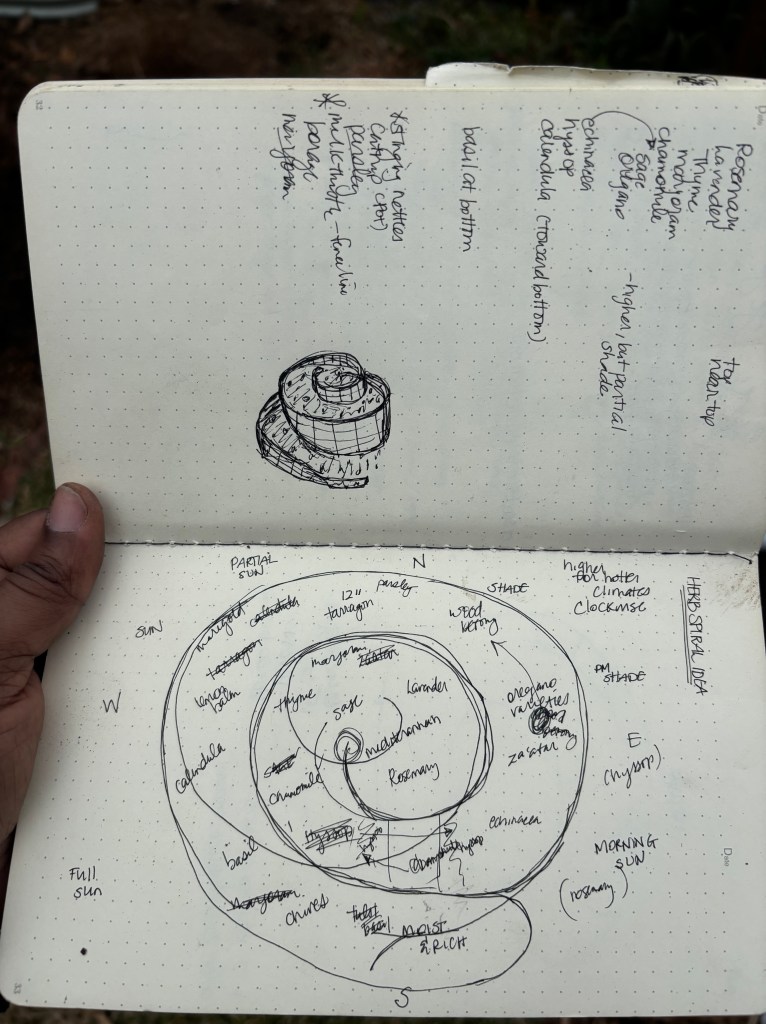
    The south-westerly side of the spiral will receive more full sun, while the north-easterly side receives more shade to partial shade. Also, plants at the top of the spiral are usually the more drought-tolerant, while more moisture loving plants get placed at the bottom. Having more height at the center of the spiral helps to create the various conditions, especially the shade and potential windbreaks.

    Some herb spirals feature a pond or a small swale at the bottom to capture excess water and provide habitat for amphibians, lizards, and aquatic plants, which adds to the ecosystem. But that seemed like a mosquito nightmare, not to mention whatever my dogs would decide to do with it

    Getting Started

    An herb spiral should ideally be located within ten feet of your house. The idea is to make gardening convenient so you actually utilize the culinary herbs your planting and can quickly run in and out of the house to gather herbs while cooking.

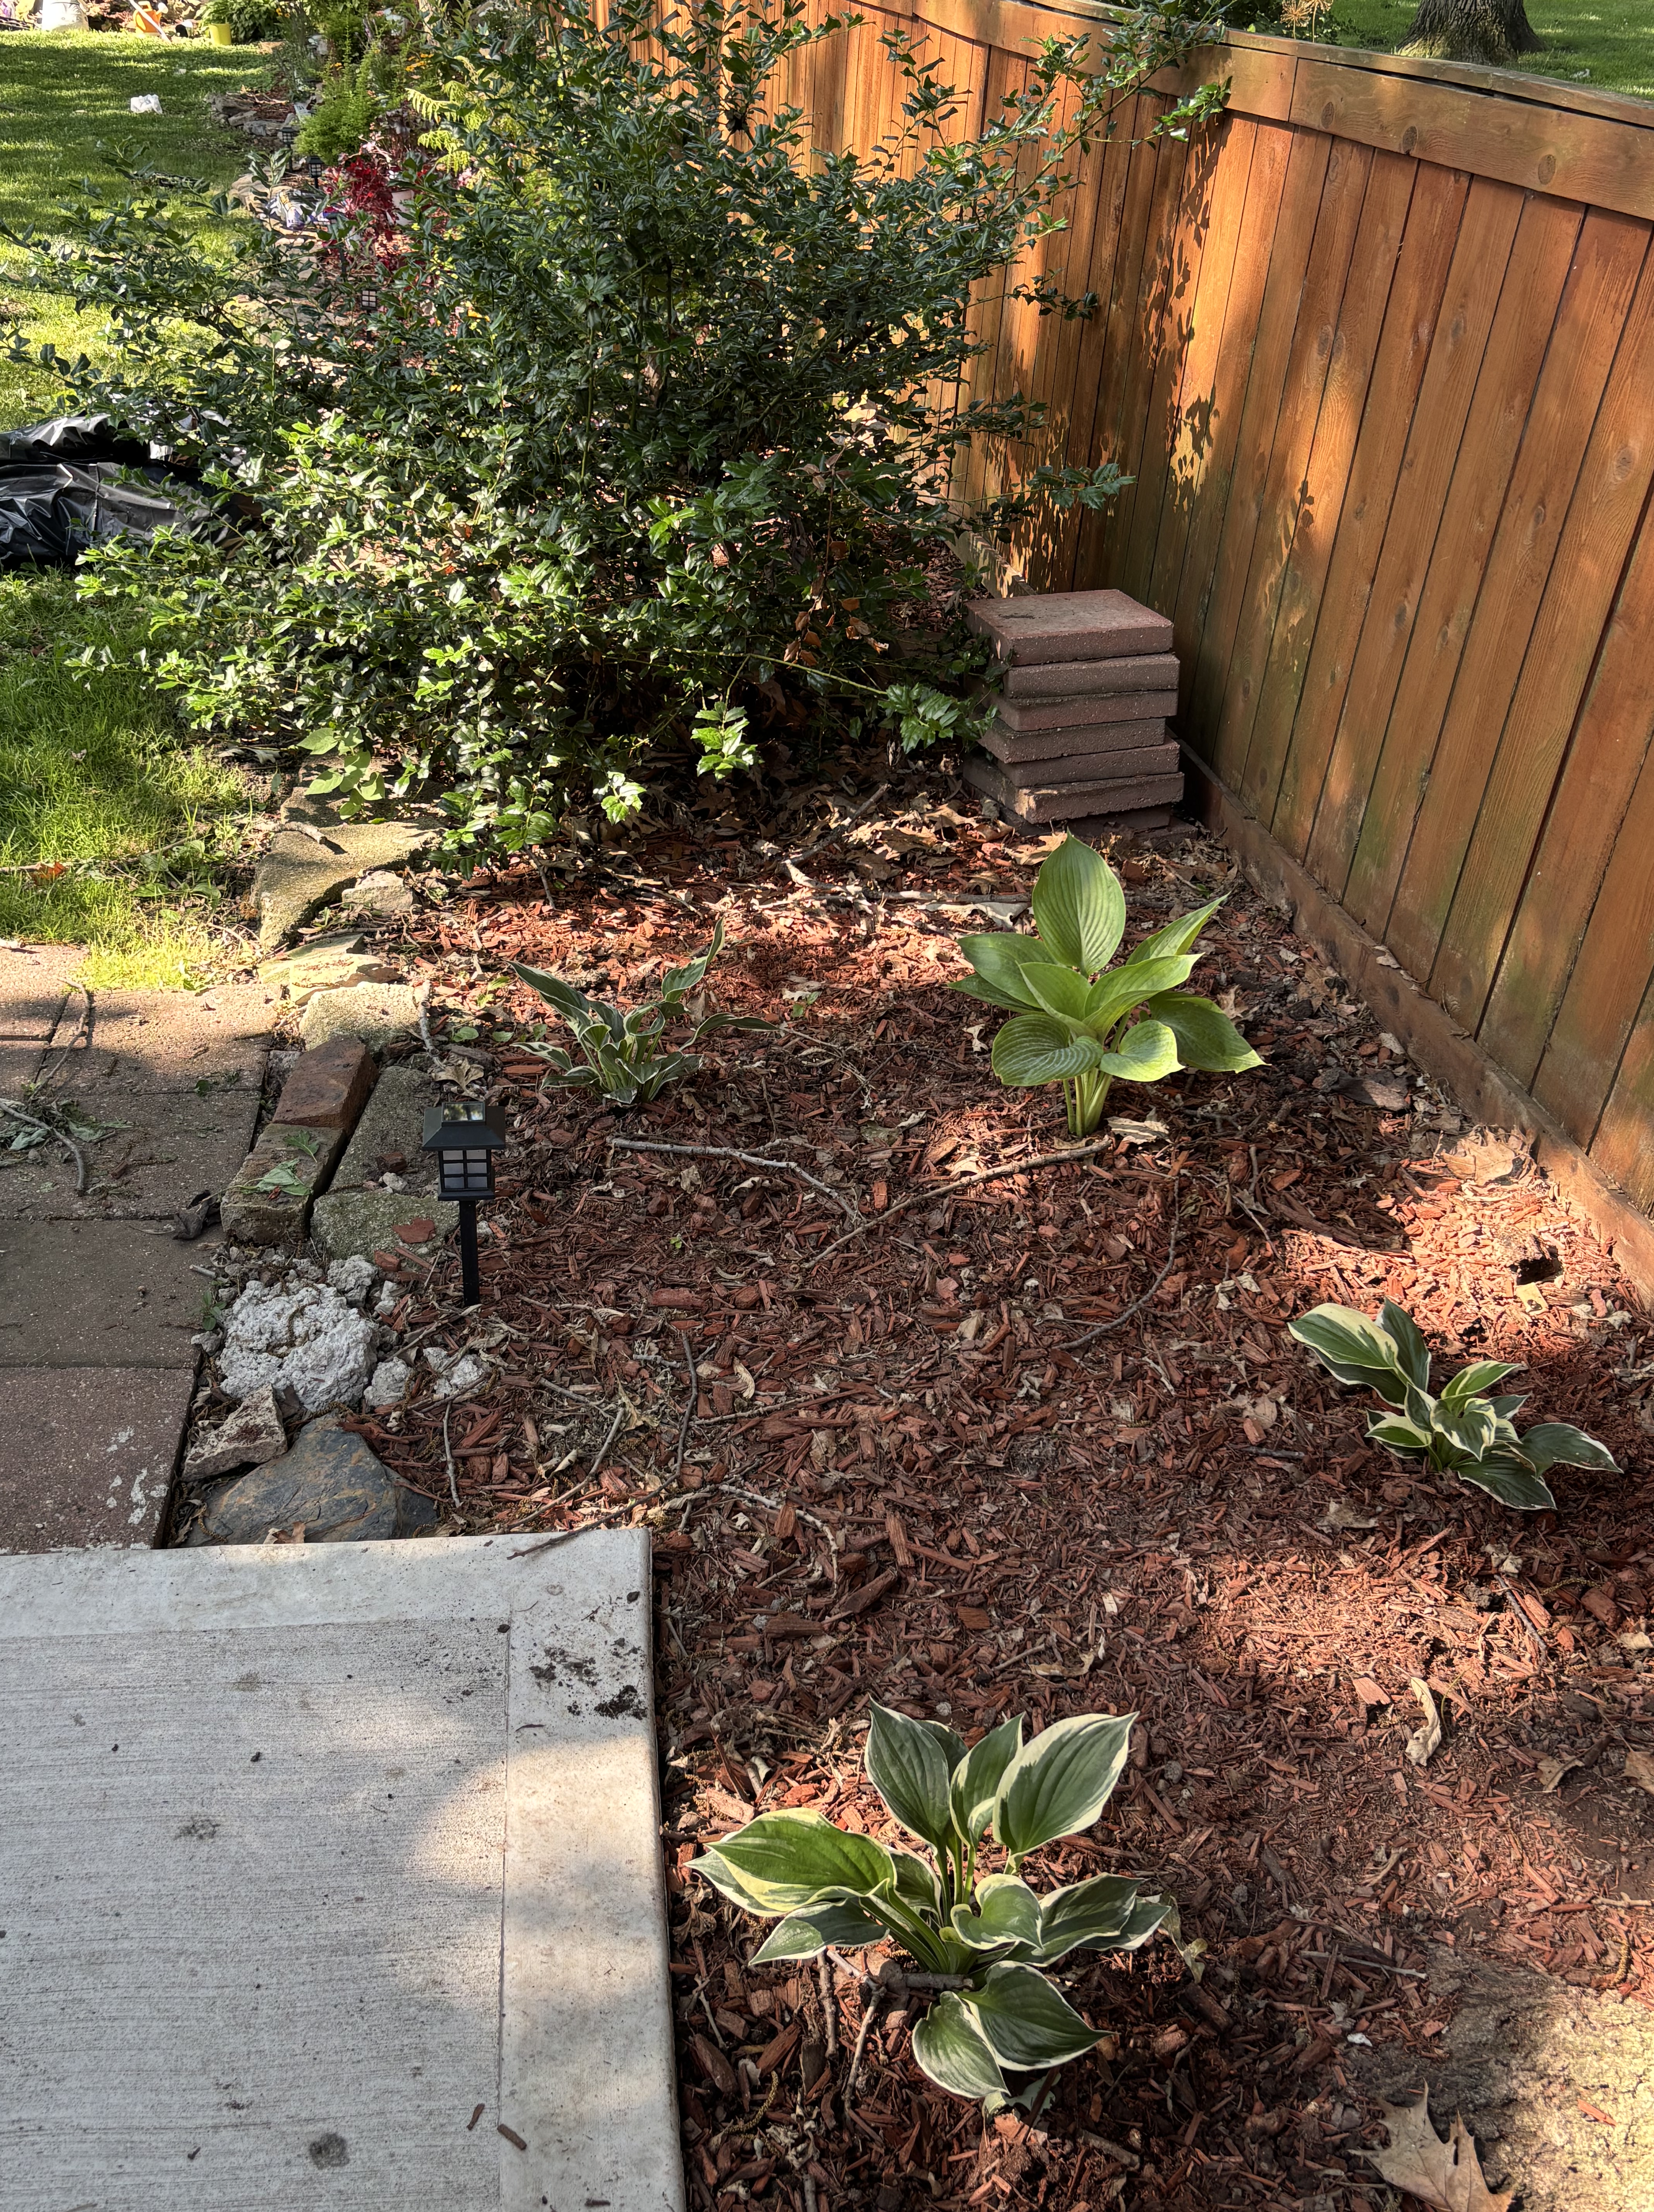
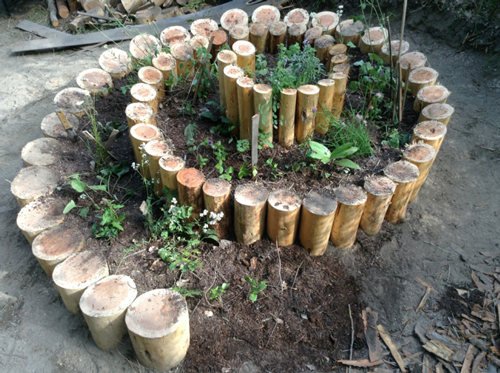
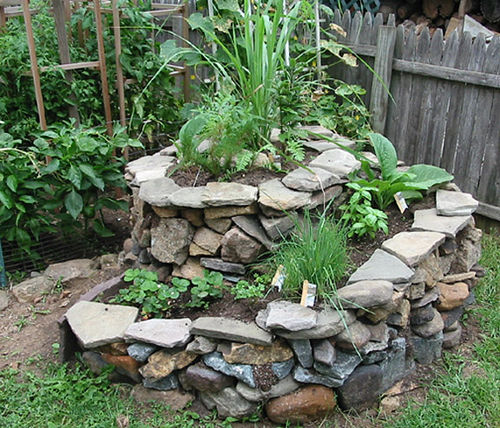
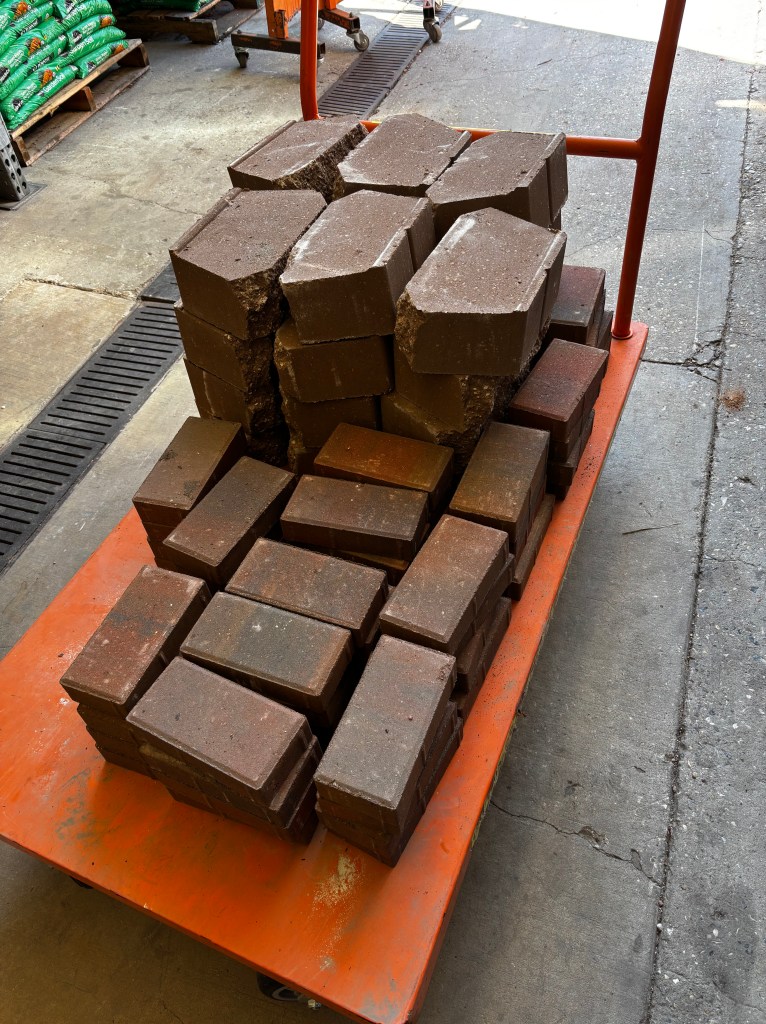
    You can use an array of different materials to build an herb spiral, but most commonly bricks or stone are used. If you care deeply about the aesthetics, then sourcing a consistent material for the entire spiral might be important. Permaculture principles suggest using the materials you have around the yard, including logs and other recycled materials you have on hand. Some examples:

    I already had bricks I got for free during COVID lockdown, when everyone decided to redo their homes. One acquaintance knocked their chimney down and another friend of a friend pulled up all their sidewalk pavers, neither wanted to pay for brick disposal, so that was all free. I did have to buy more bricks ($.68 ea.) and I opted to get SOME retention wall stones (~$2.50 ea) because they were pretty.

    The cost of an herb spiral depends primarily on how big you make it as well as how much material you have to buy to build the structure and the type of material you choose. It can be relatively inexpensive if you build small and use materials on hand, leaving you the cost of soil. But it can quickly balloon, especially if you want uniformity and size.

    How-To

    • Choose a site that’s relatively flat that gets full sunlight. Prepare the site by working the top layer of soil to create as level a surface as possible. I rushed through this step and regretted it later when it came time to stack bricks — DON’T BE LIKE ME! Do it right the first time.
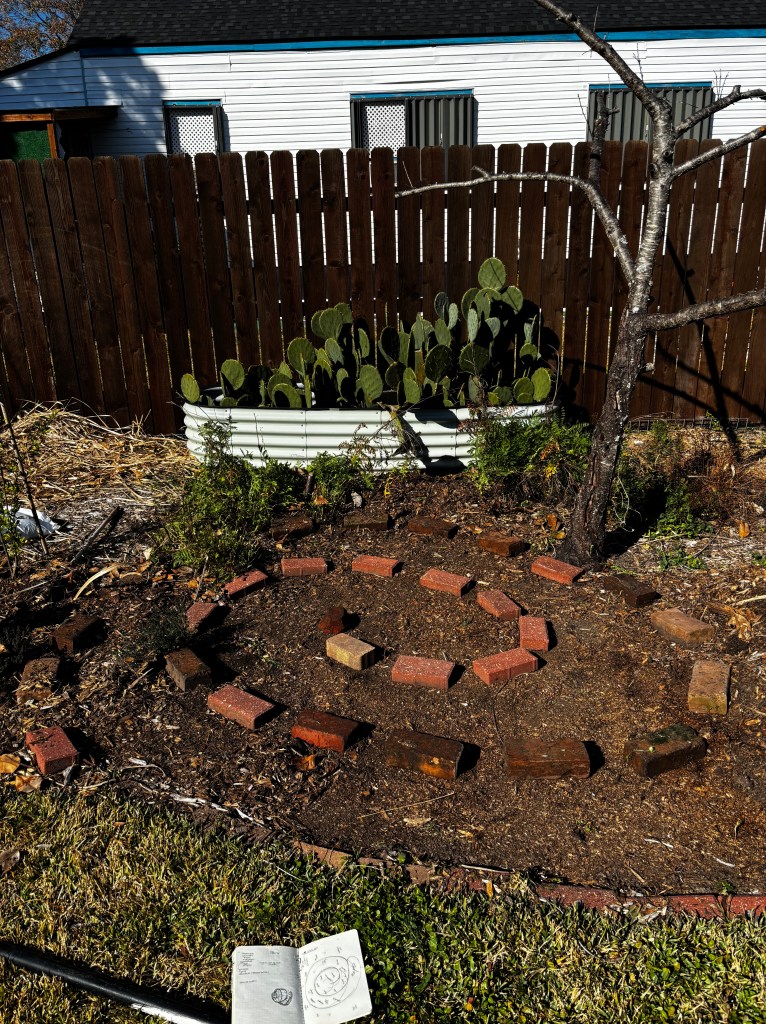
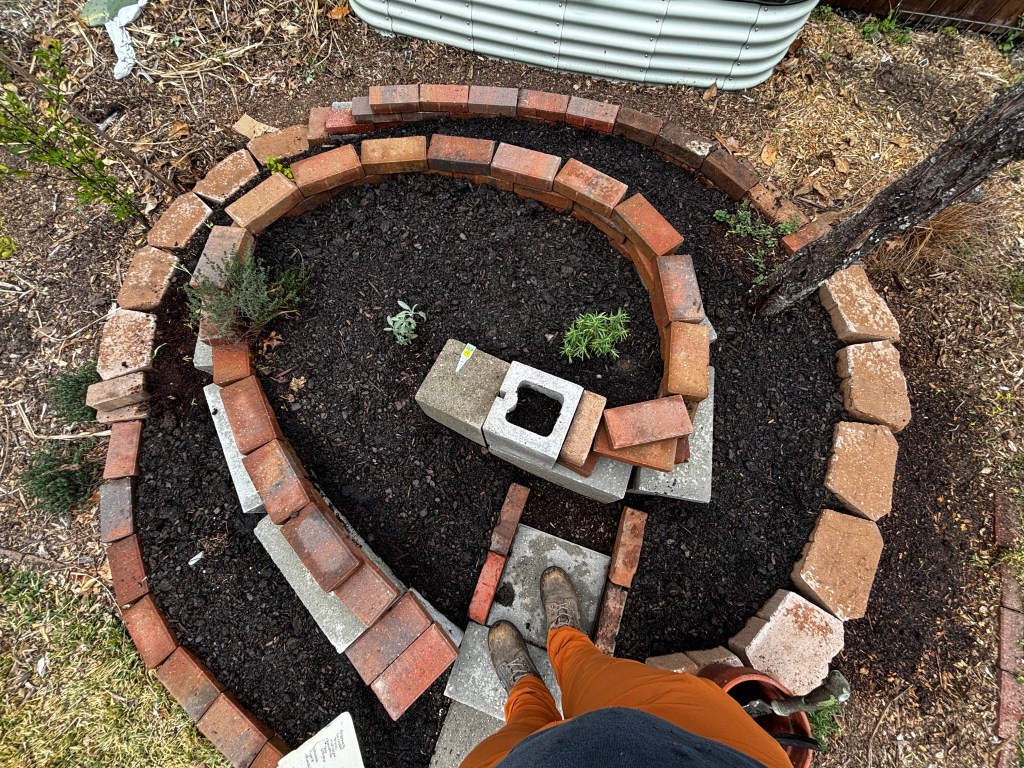
    • Create a design and do a rough layout with one row of your material (bricks). My spiral is more oval-shaped than round because that was the space I had. I imagine you could also do a more squared off spiral with sharp corners at the turns, but it may require more materials than if you did rounded corners.
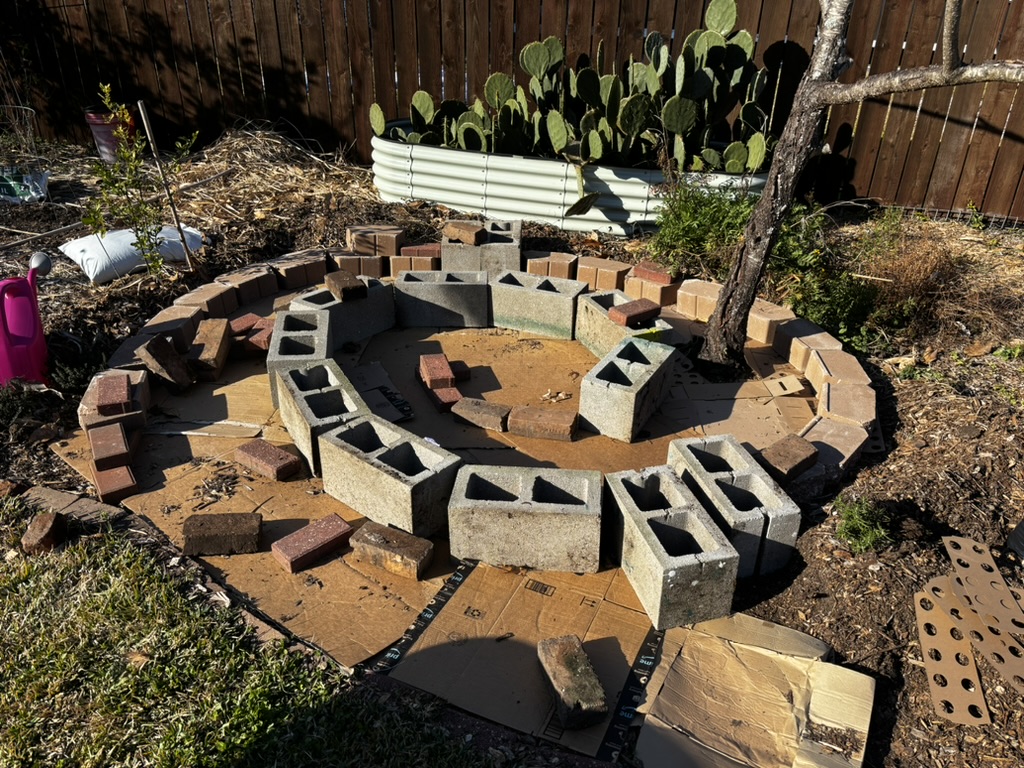
    • Place a weed barrier down. Some people like fabric weed barrier sold at stores, but it doesn’t really work and it eventually becomes a nuisance because it will falls apart and leave little shreds all over the place. I used leftover cardboard from various package deliveries. It works the same but breaks down into the soil like mulch.
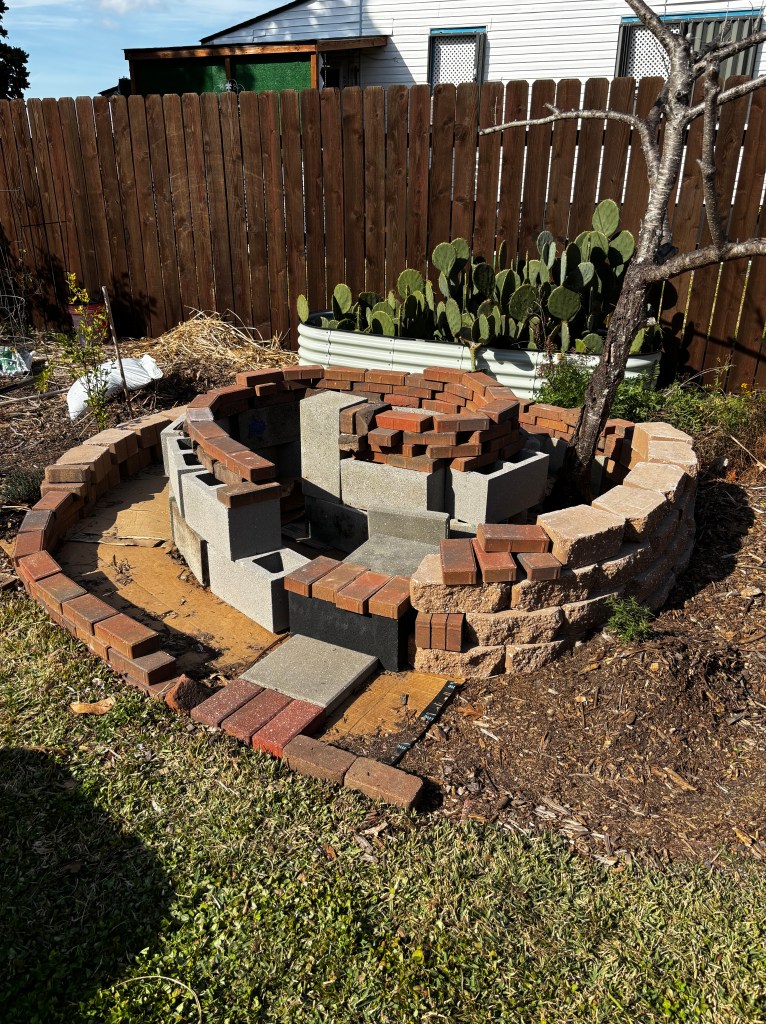
    • As a general rule, the total diameter of the spiral shouldn’t be more than 5-6 ft, and the height no more than 3 ft. so you can reach all the herbs without hassle. I made mine larger but added a step using stacked pavestones I had lying around to get in

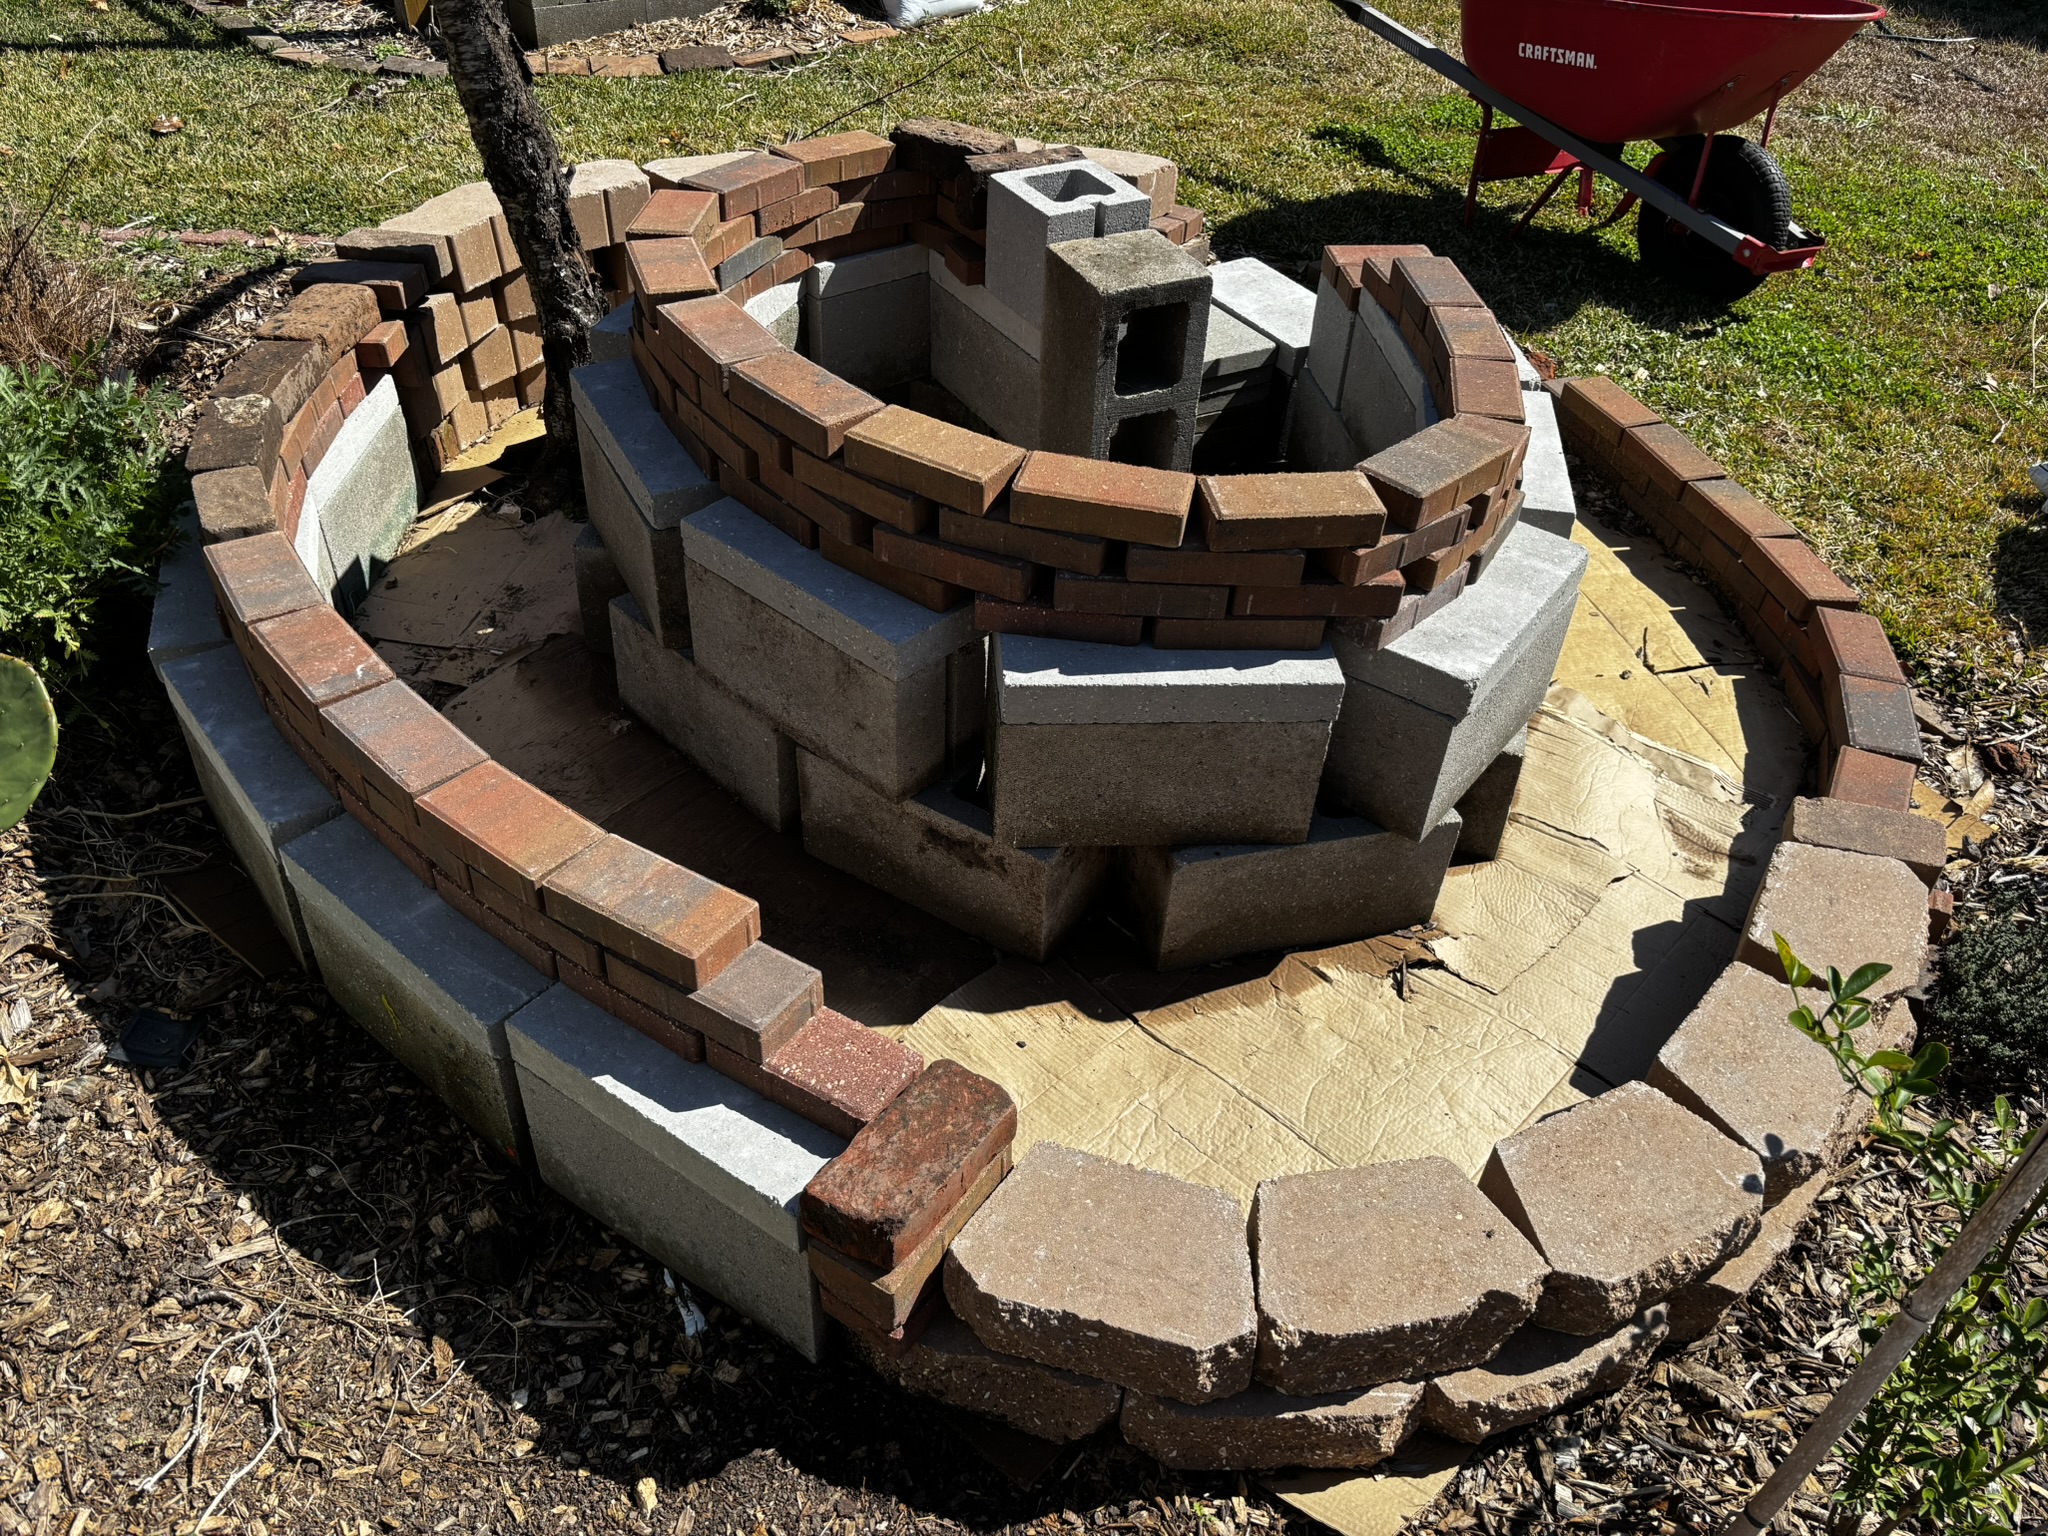
    Once you’ve committed to the design, start stacking, ensuring that you have a gradation upwards towards the center. It was here that I made multiple adjustments. Once I saw how many retention stones were needed I started playing around with some of the leftover cinderblocks I had from building raised beds a couple of years ago and realized it would be much more cost effective to buy additional cinderblocks ($1.94) to occupy space and build height quickly [2 cinderblocks = ~5 retention stones]. I also purchased some cinderblock caps ($1.98) to make it easier to stack bricks on top to create the final height.

    • The bricks don’t have to be tightly connected at the horizontal. In fact, it’s preferable if they aren’t so water can drain out and down and other mossy plants can grow. Some people opt to mortar or glue down their bricks, but it isn’t necessarily needed. I did not, but I may go back and glue down some of the lower stacks because I’m sure one or both of my dogs will knock those over. If you choose to use mortar, use it only where horizontal surfaces meet and leave the vertical seams to breathe.
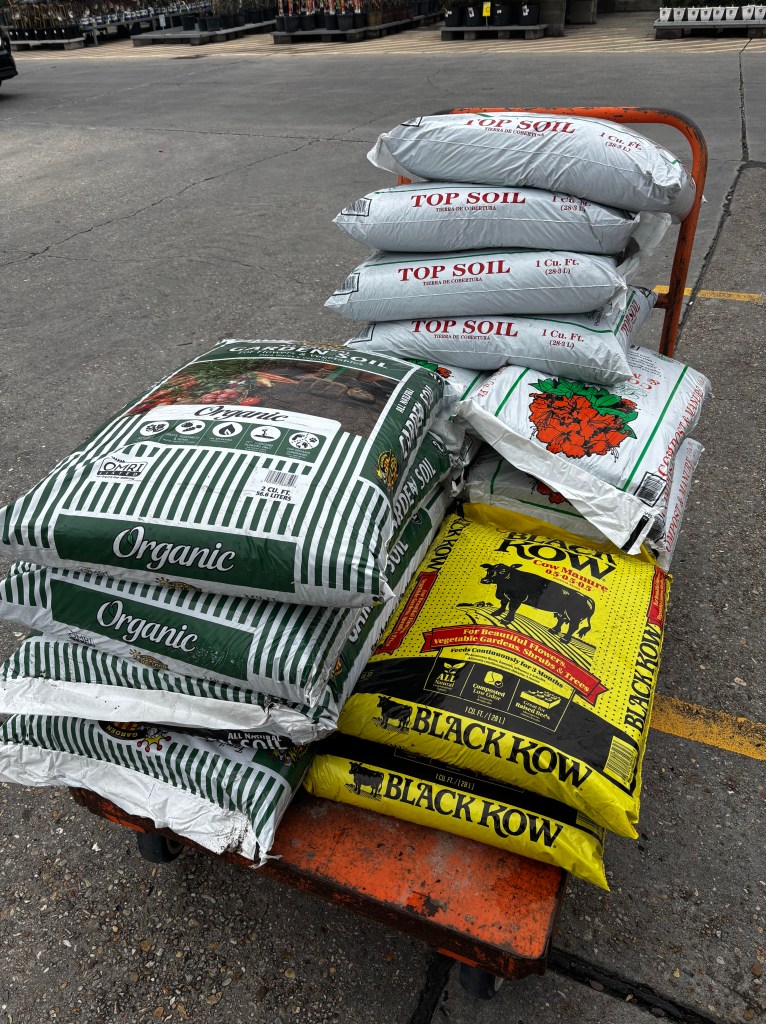
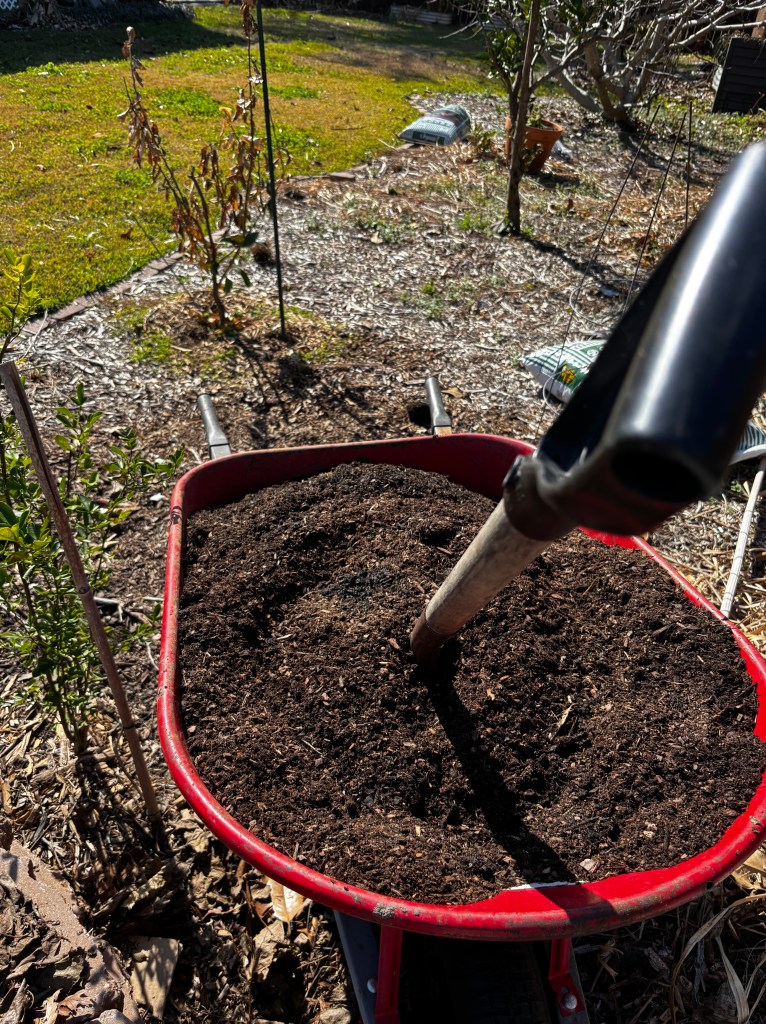
    • Once your structure is built, you can place a layer of gravel to facilitate drainage (I did not), and then you want to fill it with high quality soil. I used a mixture of organic garden soil, black kow compost, the cheap compost, and topsoil. Some sharp sand would also probably be a good idea particularly for the plants closer to the top.
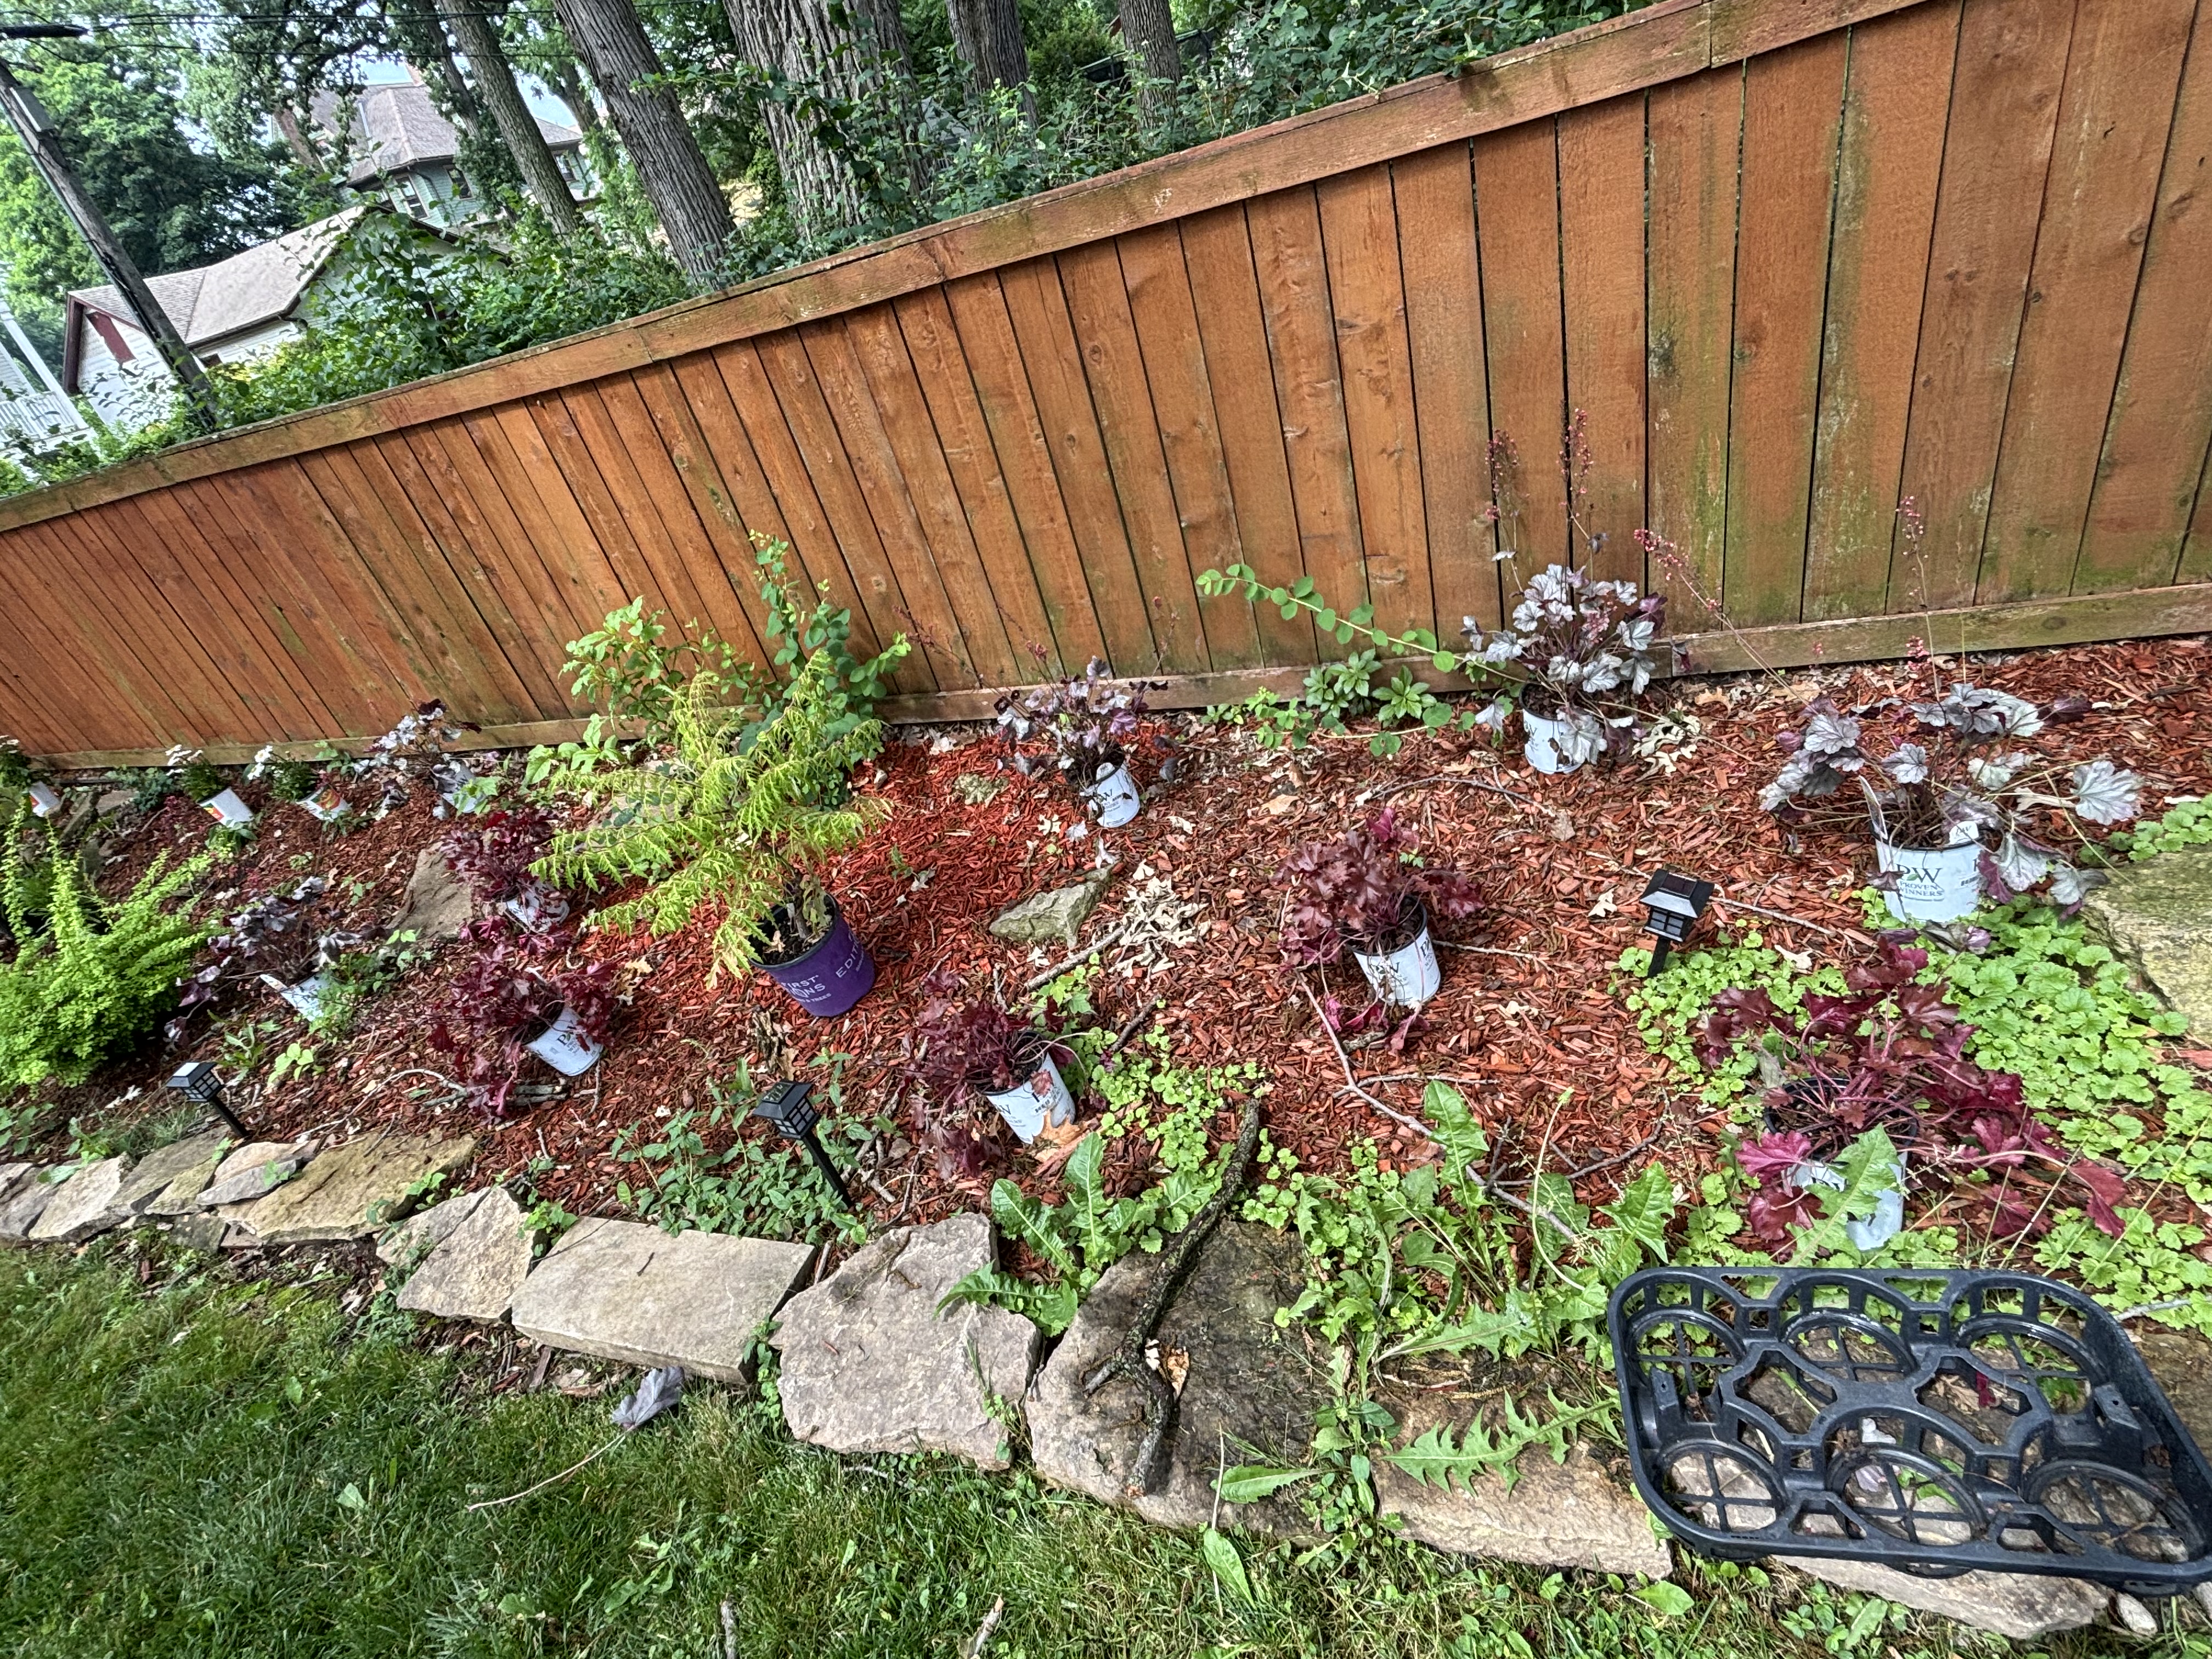
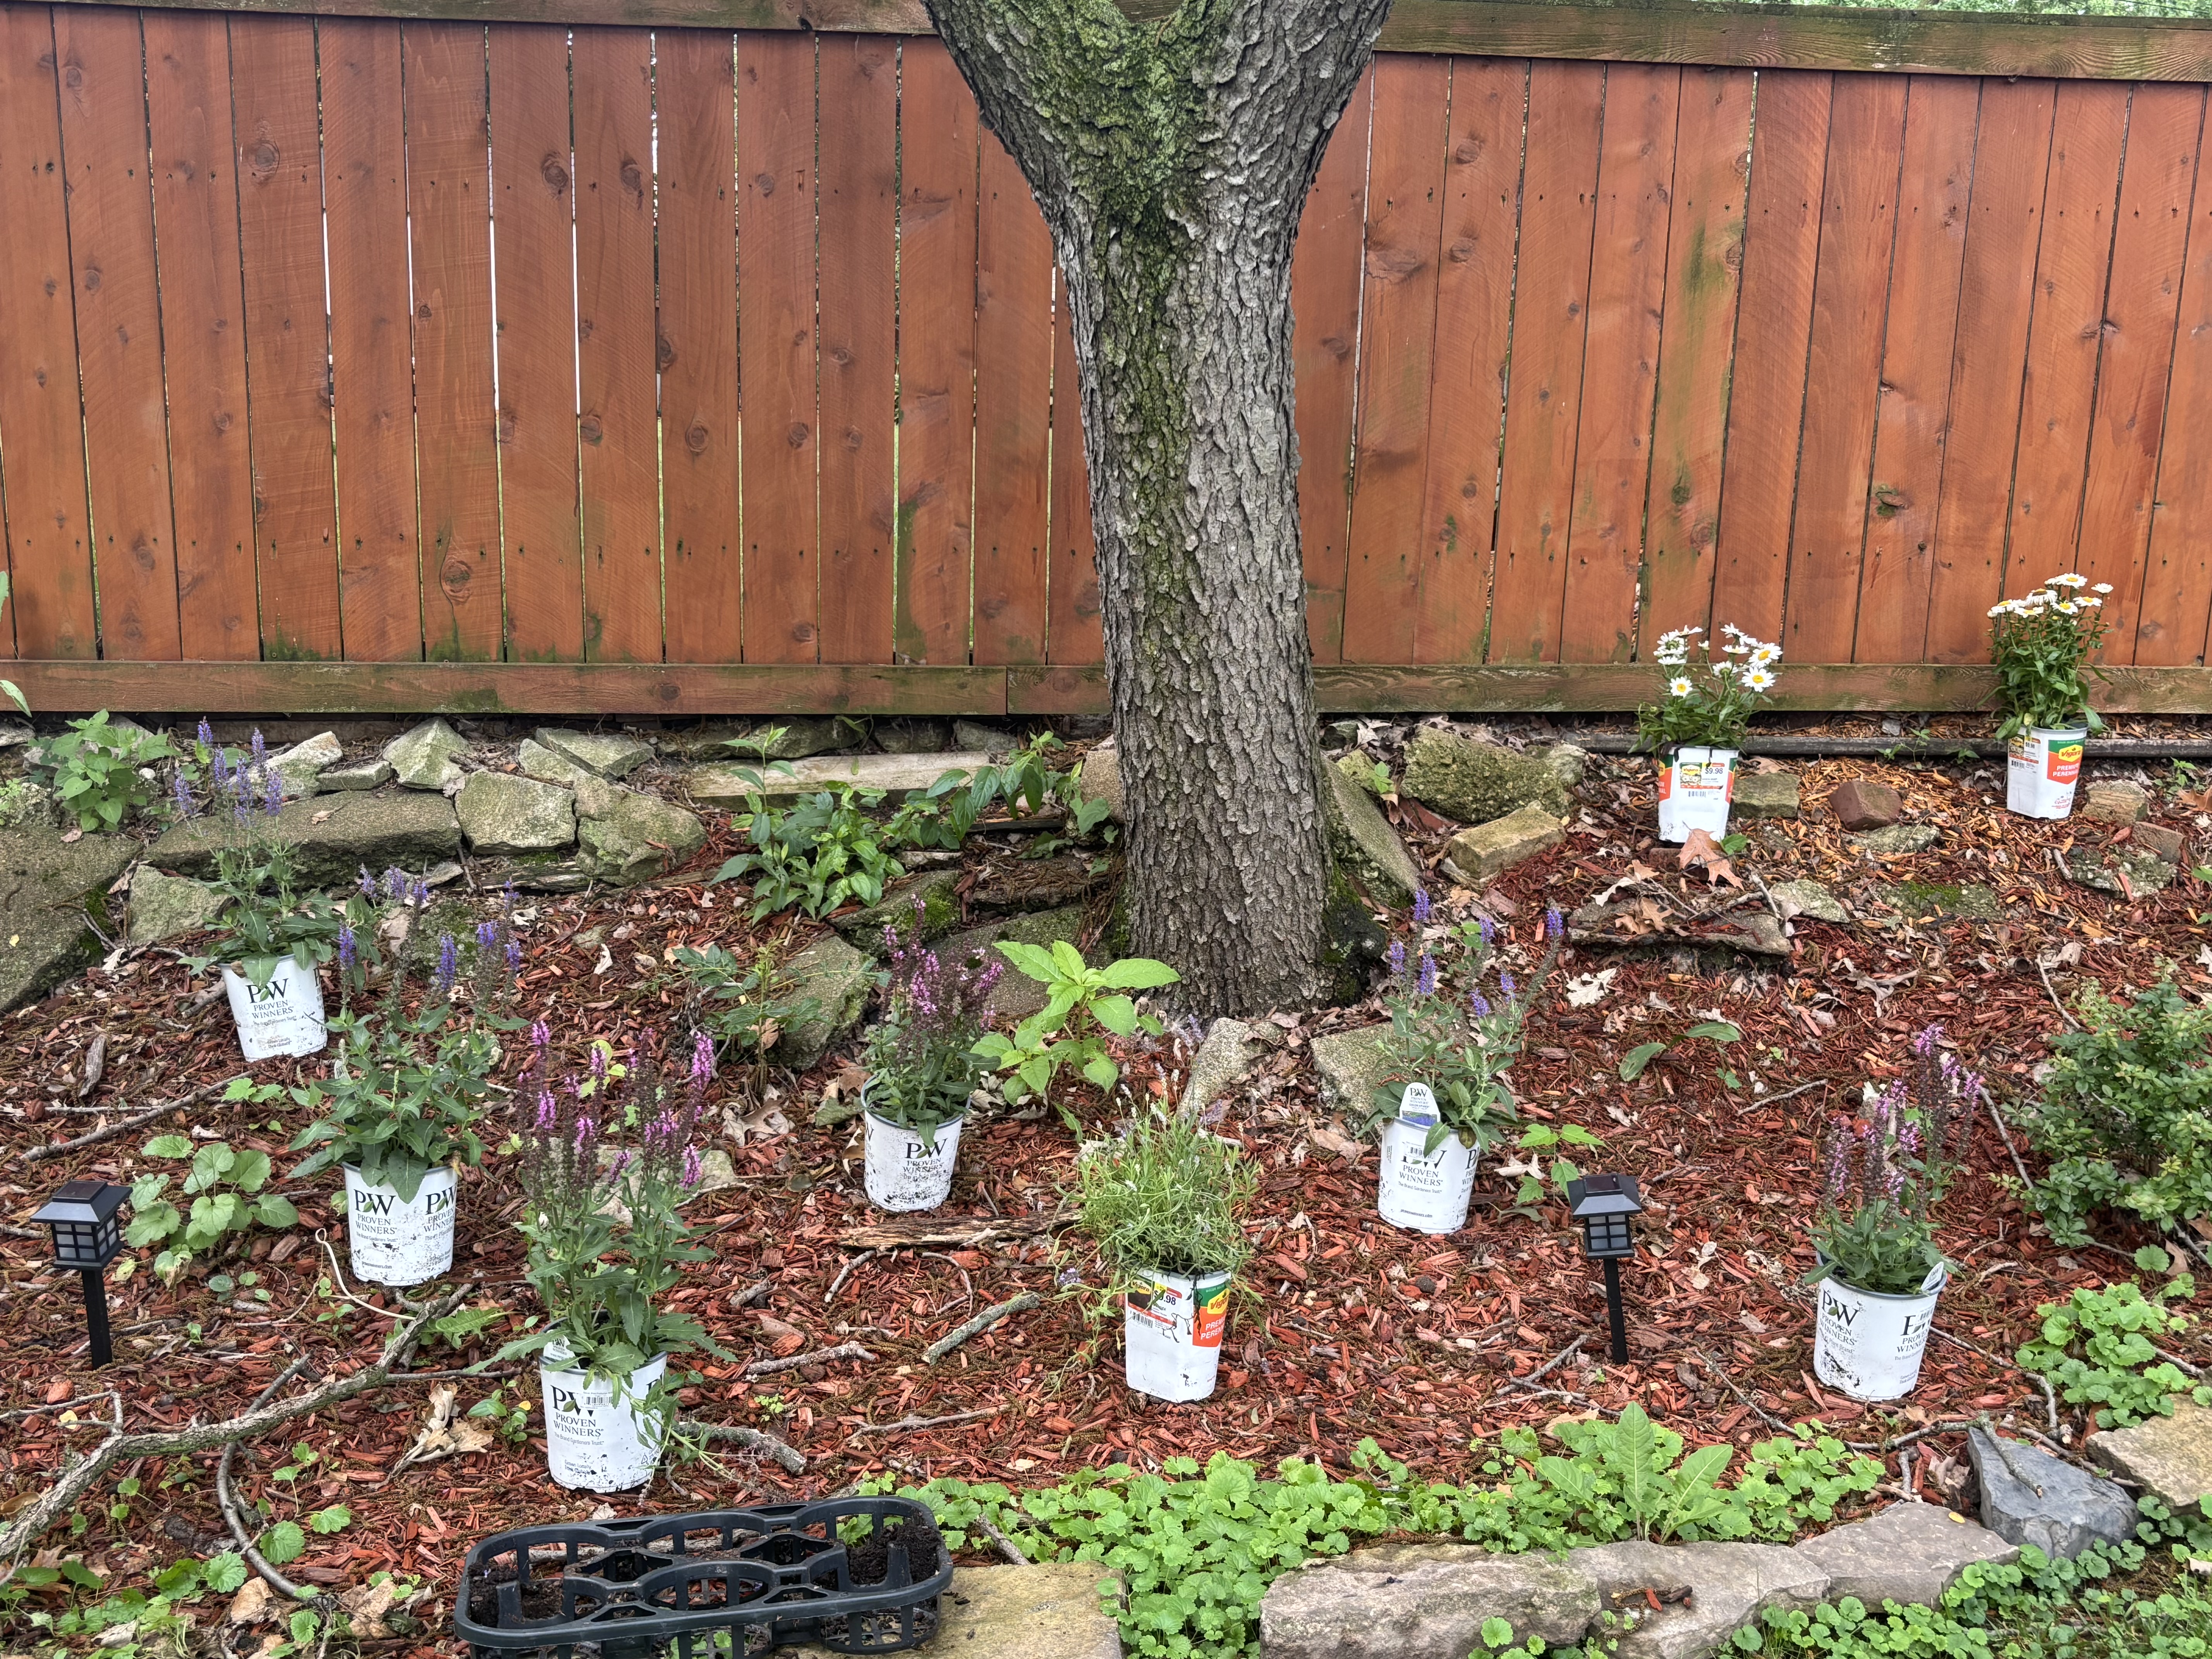
    • Then it’s time to layout your plants. Make sure they’re located in the correct location in the spiral based on each plant’s sun and moisture needs. I used a guide available for free online to help determine placement.
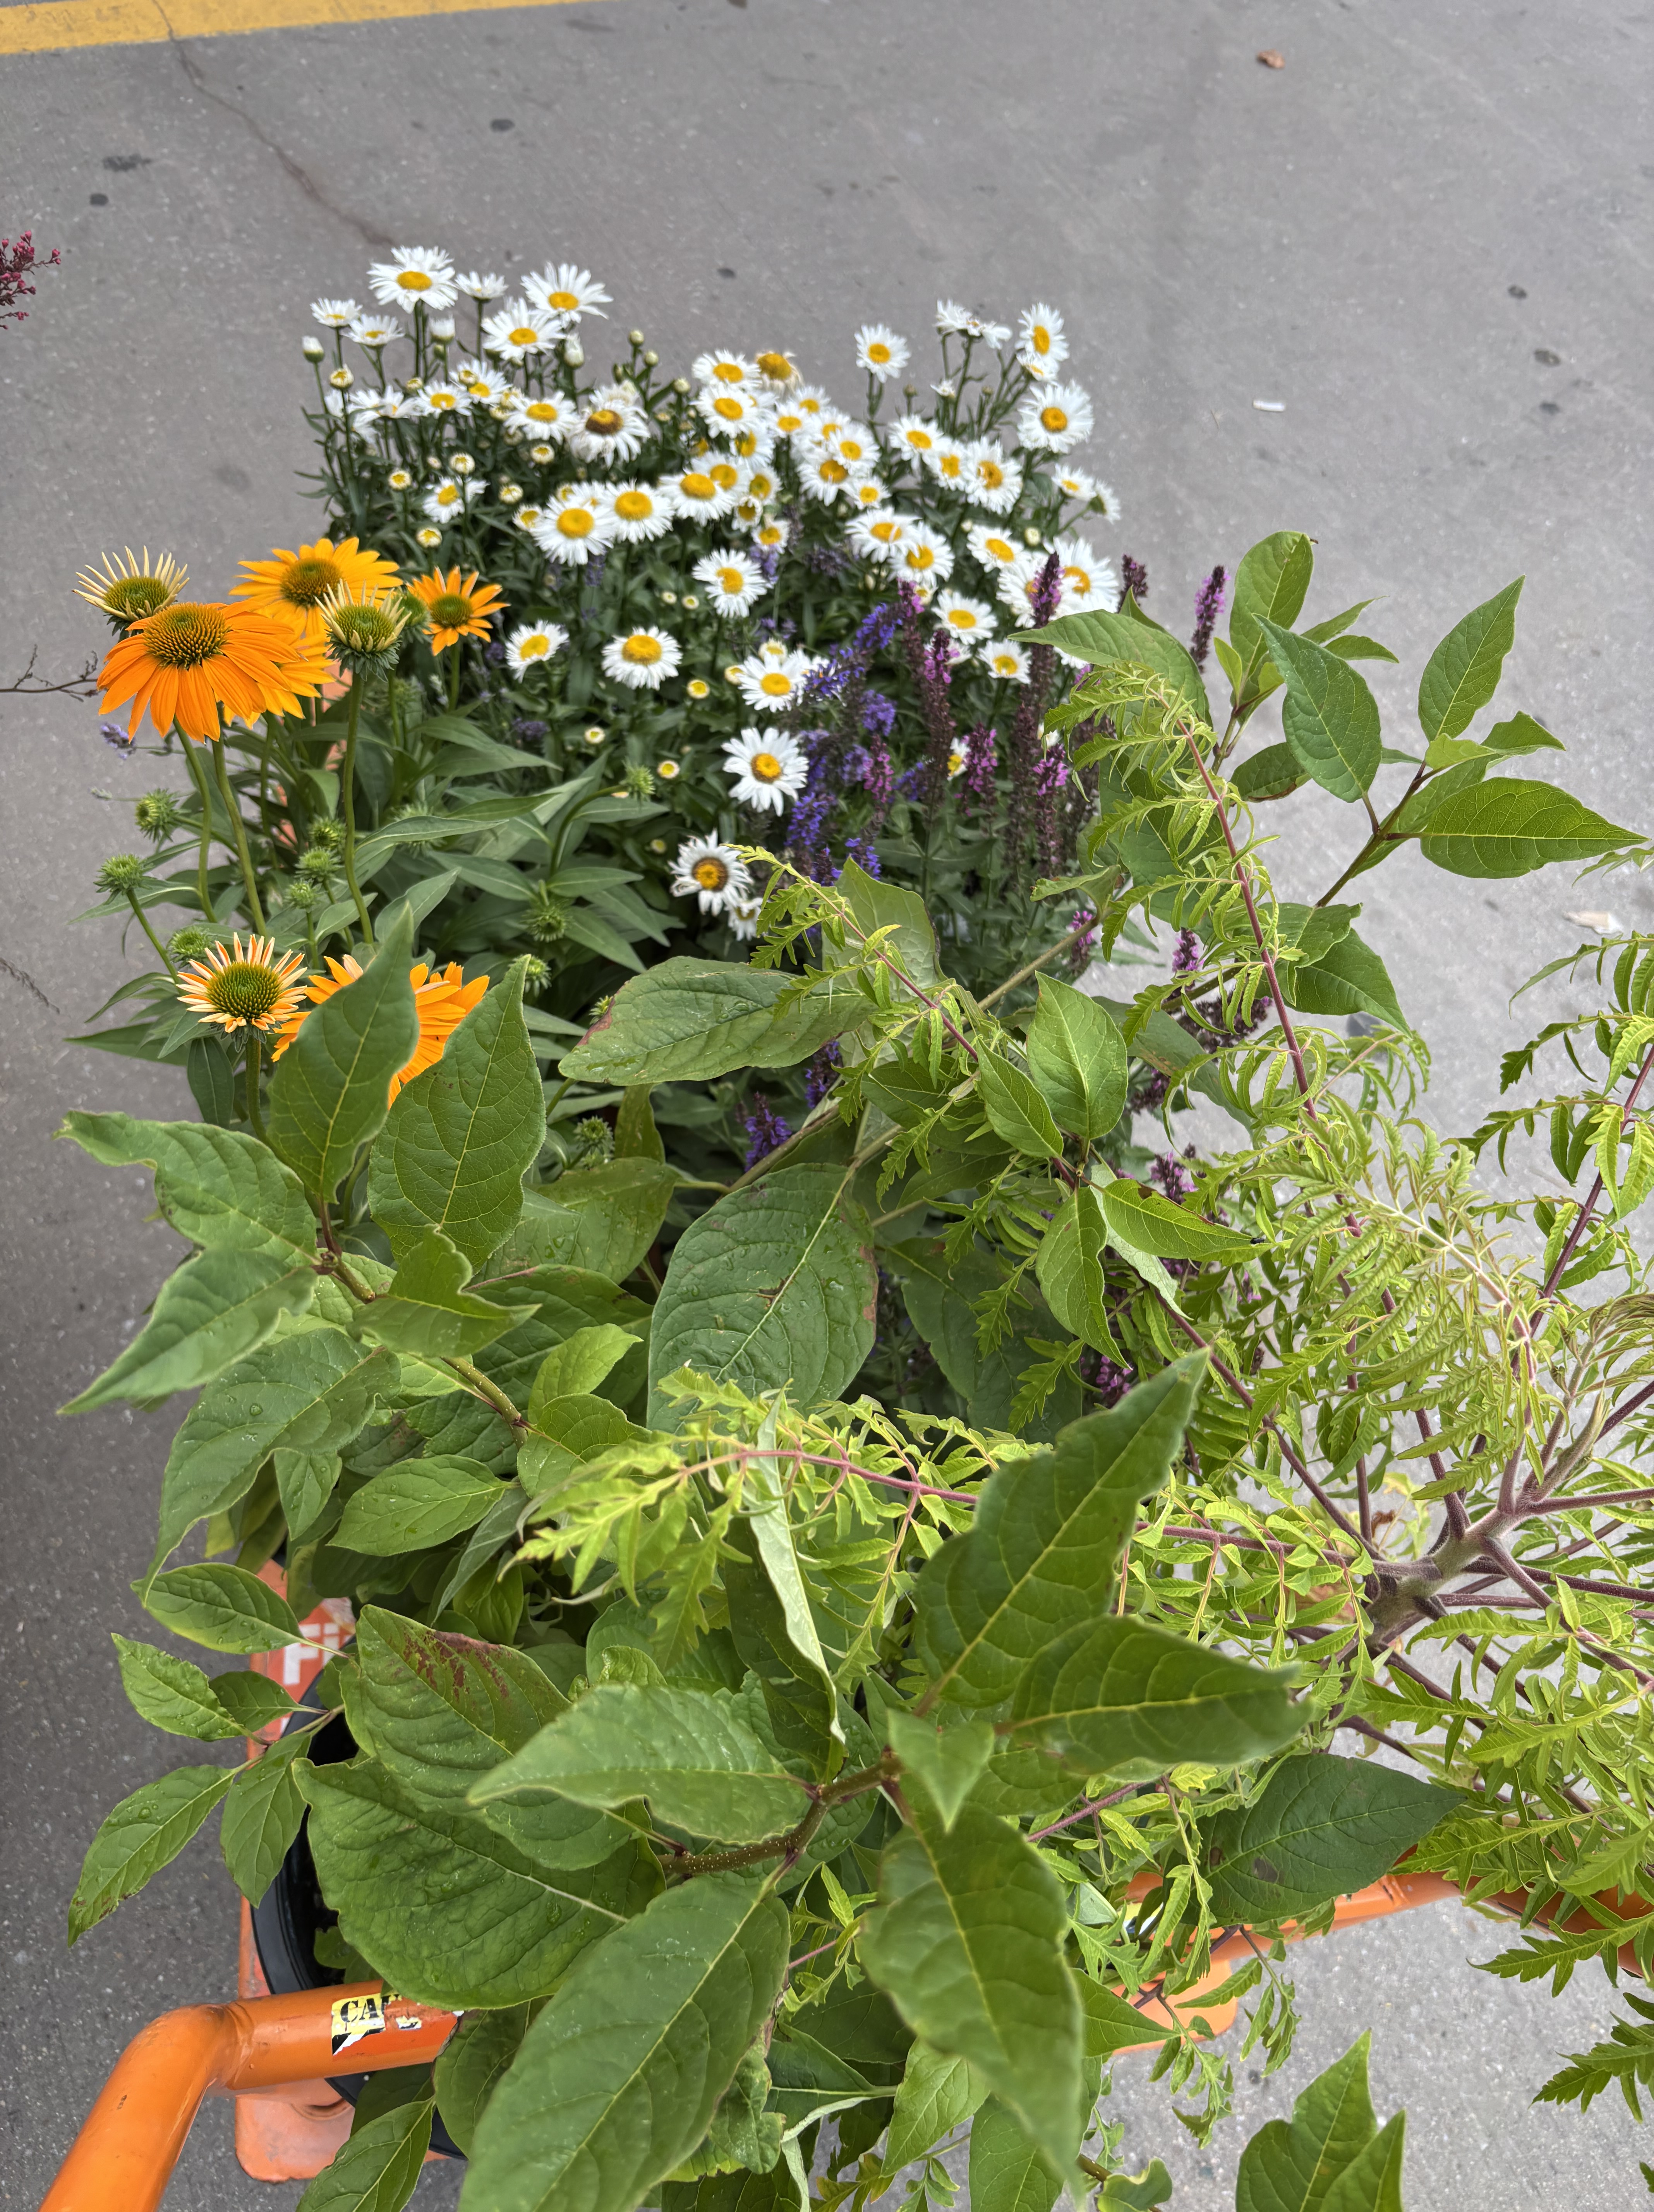
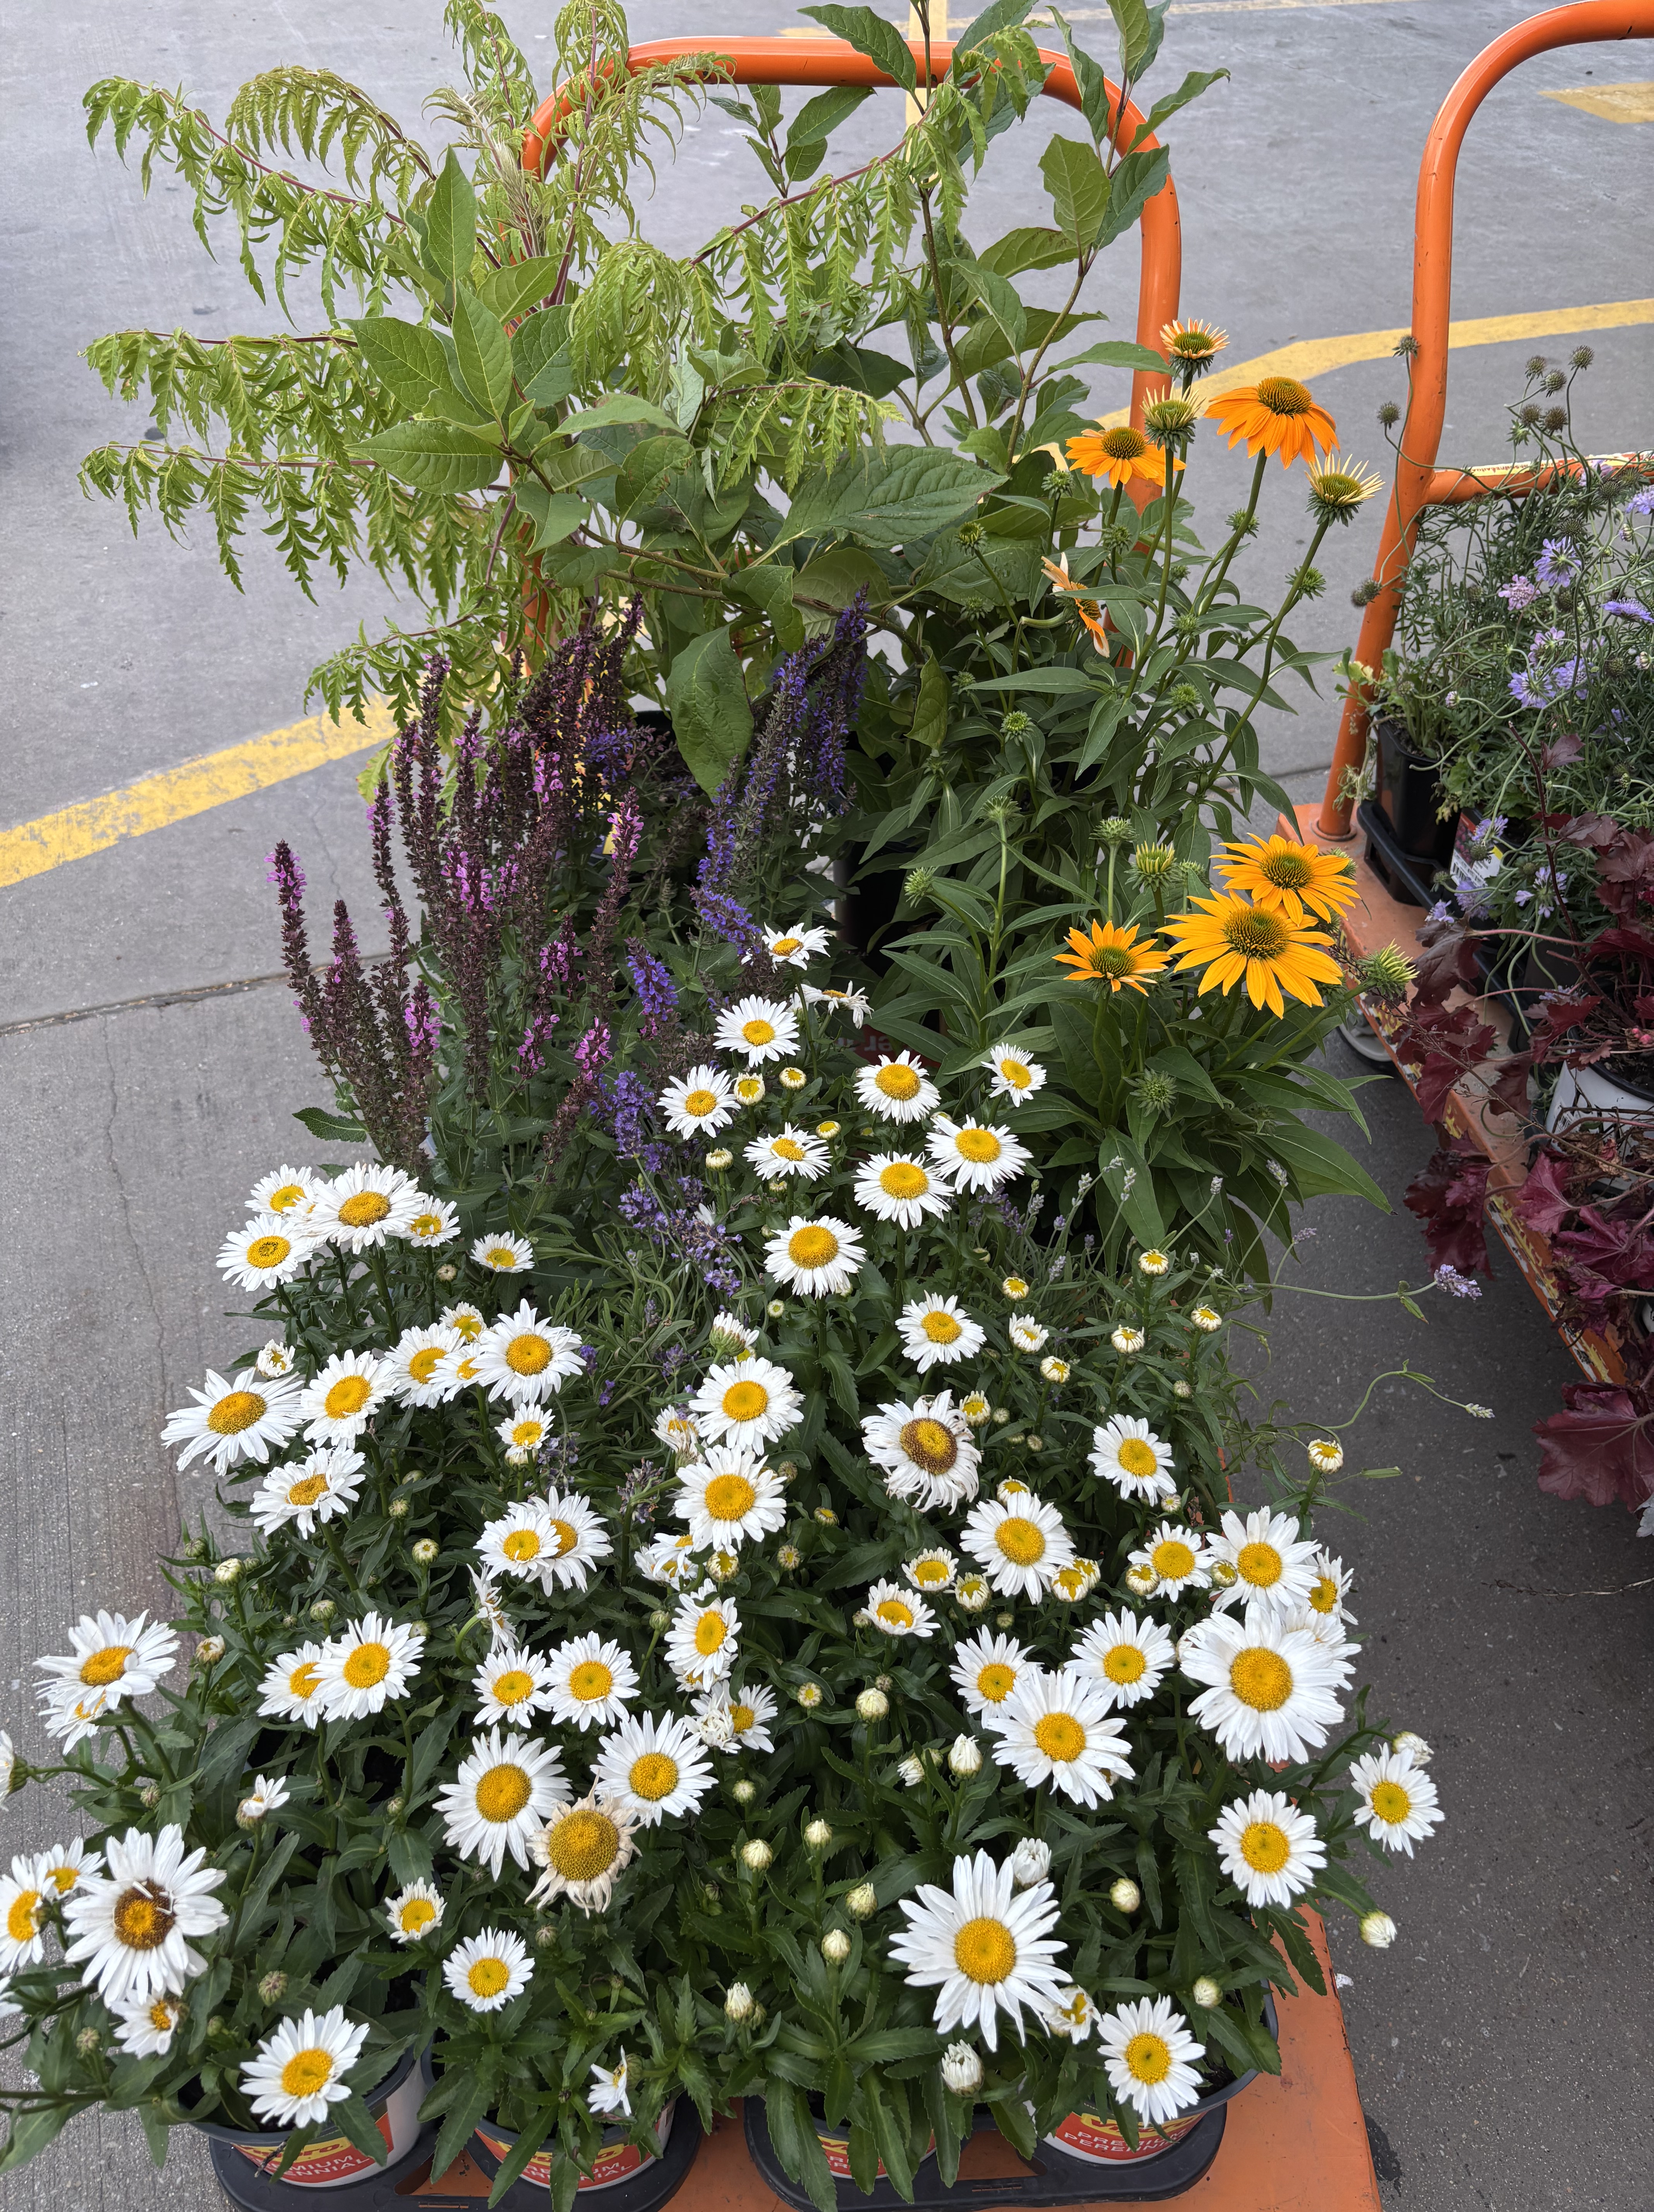
    • I did a mixture of transplants I already had and then started everything else from seed. Growing from seed can be a real headache, but it is most cost effective. That said, getting a bunch of starter herbs from a nursery will be far more satisfying a finished product.
    • If you do a mixture of seedlings and seeds, FIRST you’ll plant the seedlings, water everything deeply, and surround them with a mulch or high quality compost, THEN you’ll water down the entire herb spiral and sow your seeds. The reason for this is because most herb seeds require surface sowing (pressing the seeds into the soil). Once the seeds are in the ground you don’t want to disturb them or cover them in mulch because they need light to germinate.
    • My list of plants from top down include: rosemary, lavender, thyme, sage, chamomile, echinacea, oregano, za’atar, wood betony, parsley, tarragon, marigold, lemon balm, calendula, tulsi basil, and mint, with yarrow sprinkled into some of the crevices

    Overall

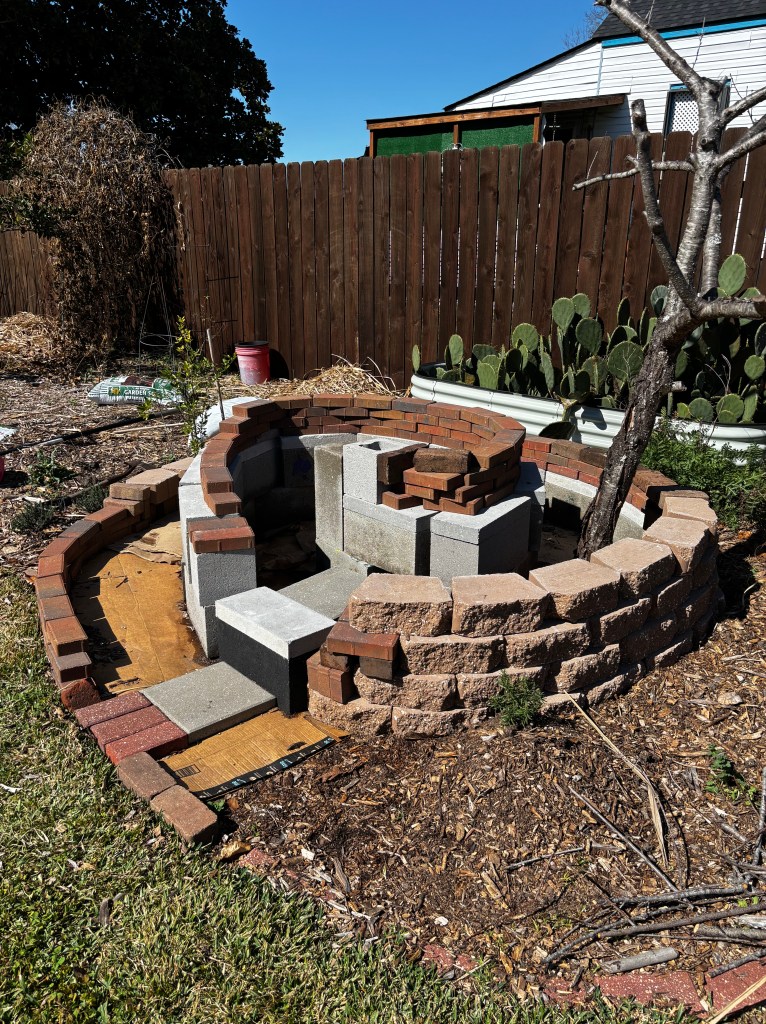
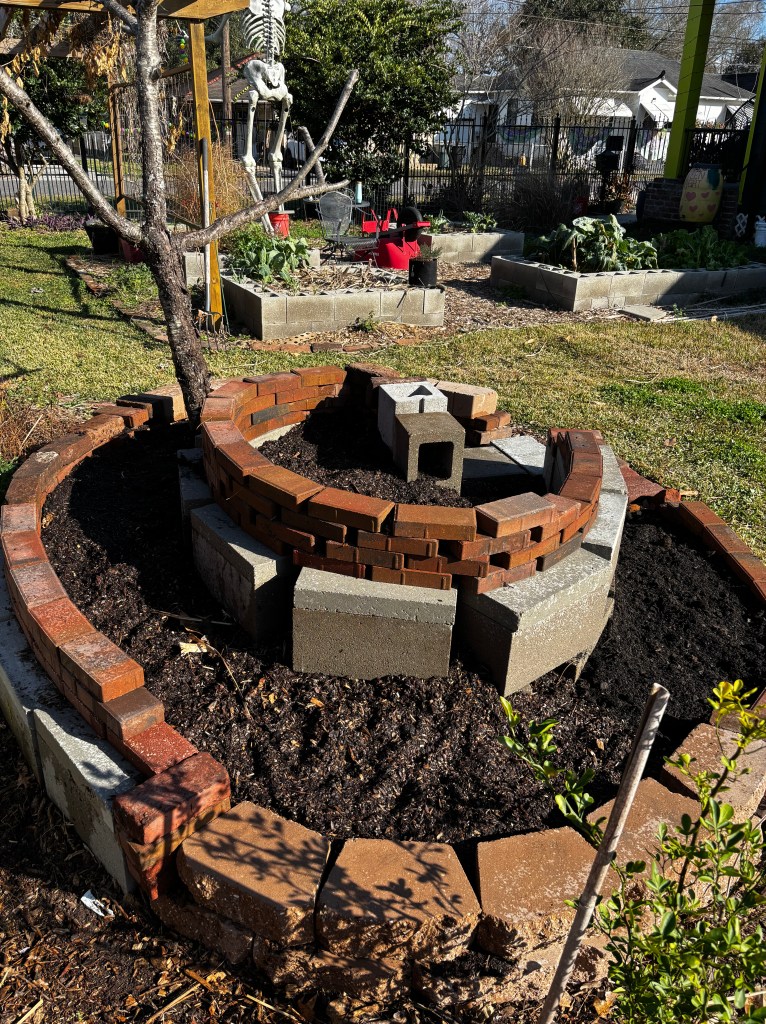
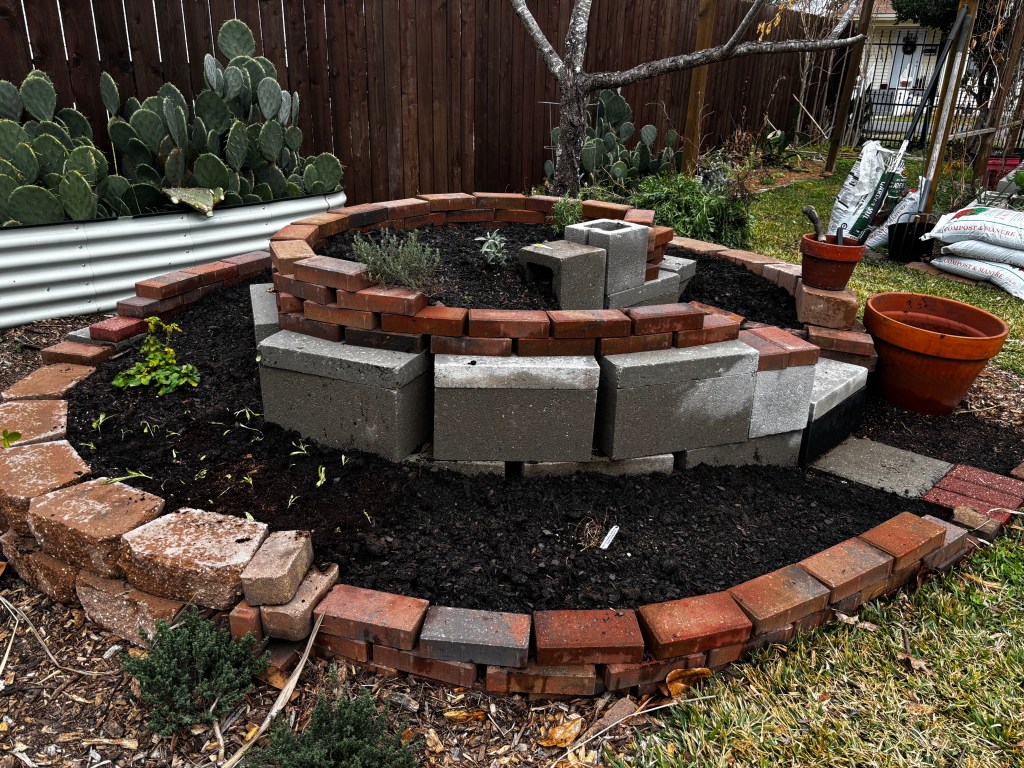
    While I didn’t plan to use such mismatched materials between the several types and colors of brick, stone, and cinderblocks, I really liked how it turned out.

    Because I started with seed, I will have to take some more care in the first few weeks to keep the soil moist for germination. If the seeds don’t end up taking, I’ll fill it with nursery plants, otherwise it will become a fancy bed of weeds and a red ant motel with nothing planted.

    The dimensions for my final project were 8 ft (short side) x 9 ft (long side) x 3 ft (height) – it’s a big structure!

    My final cost for this project was about $300 including additional bricks, cinderblocks, cinderblock caps, and the soil mixture. I already had seeds and plants, but on average, 4 inch pots from a nursery are typically $3 – $4 and a pack of seeds ranges from $3.50 – $5.00 with anywhere from 25 – 100 sees depending on the varietal of the plant.

    While that might seem pricey, pre-fabricated metal raised beds cost about $150 – $300 ea. and usually max out at 10 linear feet of planting area. The spiral has at least double that, maybe triple (my math on calculating the linear feet of spirals is a bit rusty), and allows plants with different growing conditions to be placed closer together.

    All-in, this was more cost effective. If you make a more reasonable sized herb spiral expect the costs to be lower, and if you want one larger or one with nicer materials, expect higher costs.

    Final Tips

    DO: take your time to prepare the site before getting into the build, more time up front means fewer headaches and redos mid-project.

    DO: get creative in the types of plants you include – choose medicinal herbs or even small growing greens like lettuces, especially if you have limited growing space.

    TAKE CAUTION: with mints and other aggressive plants. I included mint because so far it seems to self regulate with our volatile weather patterns, but if you’re concerned you can plant it inside of a bottomless pot to keep the roots bound.

    DON’T: include tubers (potatoes) or plants that spread by rhizome – they will take over!

    DON’T: overthink this – it’s not meant to be perfect and it’s the imperfections in the structure that make it look interesting.

  • Dog Minded Design: The Basics

    Dog Minded Design: The Basics

    Two Dogs. 130 pounds combined. 1300 square feet of space divided into small rooms. They have a large yard to play in, but they prefer to wrestle indoors. They have their own beds, but they both choose to be up underneath me at all times. All of my interior and exterior spatial designs, organization, and arrangements force me to ask a few questions –

    Will they knock it over? Trample it? Scratch it up? Eat it? Pee on it? And most importantly:

    Can it be cleaned?

    Despite living solo, I don’t necessarily get to indulge in my first choice for decor – the pups live here too. While they won’t argue with me about paint colors they will show me whether I should’ve bought that lamp, put the couch there, or purchased that throw pillow.

    Creating a homeplace when you have dogs or other furbabies means considering their actual behaviors – they’re all good pups until they’re not – and their needs at the same time you think about your own desires for how you want a space to look, feel, and function. The sweet spot is when you find options that work for all of you.

    My Wants

    There are a dozen aspects to address for how they influence my design choices, but let’s take rugs as an example:

    What I wanted: A bright, super plush, 100% wool, Moroccan Rug with tassels

    What I got: A somewhat less bright but still vibrant, medium pile, 100% Polypropylene, Persian-inspired rug with small tassels. I used a very thick rug pad to makeup for the lack of pile height.

    It still gives me the drama I wanted in my living room, without the drama of having to be precious about the rug. I don’t relish having what amounts to more plastic in my home, but I can vacuum it every day, clean up stains easily, and it can handle heavy foot and pup traffic, as well as their mini dig-in-the-carpet temper tantrums.

    Their Needs

    They need a place to sleep, a place to eat, and a place to play (indoors and outdoors). Dog items are notoriously UGLY unless you’re willing to dish out a lot of money for the boutique items, usually sold by celebrities. And even then, they’re not usually designed with bigger dogs in mind – regarding size and durability for power chewers.

    My dogs don’t sleep in crates, to be honest, at least one of them usually sleeps with me, but they still have beds. And if you’ve been to a pet store lately you’ll notice that almost every dog bed is one of a three colors: tan, dark brown, and gray. Sometimes there’s a dark blue or black bed, and occasionally they jazz them up by adding stripes, checkers, or plaid. I have hated looking at every dog bed I’ve ever bought them, but after nearly a decade, I finally found rich toned, washable, beds that didn’t break the bank. They match my overall interior jewel toned and vibrant household, they’ve held up for the past year, and the dogs actually sleep and nap in them.

    The pups also have a dedicated feeding station in my kitchen after I rearranged the kitchen layout (more on that another time). For whatever quirky reason, my oldest dog likes to take his treats, and sometimes his food, to eat them in a room with an area rug rather than eat off the wooden kitchen floor. So I broke down and got them a carpet mat for under their food bowls, which has the added bonus of minimize the amount of drool and water drips from my younger dog.

    I know there’s much debate about whether to have elevated food bowls, and I won’t go into that, but I managed to snag theirs at HomeGoods. And their food is now stored in an XL Simple Human pet food can. It was definitely a splurge, but I don’t groan every time I look at it like I did with those cheap clear plastic containers, it’s airtight, has a locking closure, has a magnetic scoop that stays attached to the lid, and can fit their massive bag of dog food.

    As for play – they have a huge yard to run around in, and yet they’d rather find the tightest corner of my living room, preferably right next to me, to rough house. I haven’t quite figured out the best options for that nor have I come up with a not-annoying place for their toys. But when I do, you’ll be the first to hear about it.

    Check back for future articles on some of the decision matrices for decor choices, spatial arrangements, and organization with your furbabies in mind!

  • Red House on the Hill

    Red House on the Hill

    Landscaping Chicago – Summer 2025

    Desires:

    Lush, colorful, low maintenance, and winter hardy, landscaping in the fence-line garden beds.

    Concerns:

    The very steep hill (even for me). The homeowner, an older woman, was unlikely to traverse that hill frequently and there was no water source that reached to the bottom of the hill, meaning she would have to hand water the plants at the bottom and go up and down the hill to fill the water can.

    The prior landscaper she hired did very little consulting with the homeowner about the types of plants they chose or the maintenance required. About half of the shrubs they planted died within the year but there was little visual interest or color at a very high cost.

    Plan:

    Use only perennial flowers that spread, self seed, add color, and come back after a freeze. Incorporate greenery that fills out – hostas – in varying colors and sizes.

    Materials:

    All the plants and soil came from Home Depot and mulch from Menard’s. We considered some of the plant nurseries, but they were farther away than she wanted to commute and were priced higher than the budget she had in mind for the size and quantity of plants.

    The Installation:

    This took about two days of work including multiple trips with the homeowner to different stores. There was also an unseasonal heat advisory while I was there. It didn’t feel anywhere near as hot as it is in Louisiana, but I will admit, this Chicago heatwave did creep up on me and slow me down a pace.

    Her property butts up to a heavily wooded area that was overgrown into her property. I pulled the heavy vines wrapped around her chain-link fence, and hand weeded both inside the beds and along the flagstone/lawn border as I went. There was one particularly invasive weed growing alongside these beds that needed a lot of attention, but was also indicative of poor lawn health.


    Final Look

    Future Recommendations:

    The current hose spigot was on a side of the house towards the front where no easy to source length of hose would reach. I suggested she get her plumber to add a spigot to the other side of the house and purchase a retractable hose reel that ran at least 100 ft in length so she wouldn’t have to trek too far down the hill to water the plants at the bottom.

    Although the focus of this project was the ornamentals along the fence line, her lawn was also struggling: lots of bare patches and invasive weeds. We discussed that she should work with her lawn maintenance company to find an overseeding and fertilizing course of treatment over the next year. But I also suggested that she find a different lawn company than the one she was currently using because they were not trimming the majority of the weeds at the bottom of the hill. (They knew she wasn’t going down there and they were cutting corners and charging her for services half provided).

    ***

    I’m excited to return to Chicago this spring to see how everything looks after the ground thaws. Hopefully, the plants bounce back and spread out, but if not, I’ll do some touch up work.

  • Kill your lawn! (Or don’t.)

    Kill your lawn! (Or don’t.)

    Over the past few years, there’s been a lot of dialogue around killing your lawn. Kill it and get rid of your mower, trimmer, and blower. Kill it and plant native species. Both are excellent reasons – they benefit the ecosystem by reducing fossil fuel use and noise pollution, and increase biodiversity.

    Yet, this past week, I installed a pallet of St. Augustine sod.

    I have a huge lawn; my home sits on a double lot. Between the lawn and the swale (the green space between the sidewalk and the road that I’m also responsible for), there’s a lot of land to mow. But I’ve been gradually reducing the size of my lawn – planting trees, building out garden plots, and adding raised beds. I also built a rain garden and had a french drain installed along the length of my house, because when it rains, it storms, and floods.

    It’s also a lawn full of weeds. I didn’t notice at first because everything was green, but there were entire sections of the lawn that were nothing but weeds and the excessive rains only fueled their proliferation. I’ve used all types of selective herbicides (don’t judge me) and hand picked others, all in futile attempts to give the grass time to outcompete.

    “Weeds” are nothing more than plants you didn’t intentionally place somewhere. Many are harmless and have some ecological value – attracting pollinators are providing food for birds. Others are invasive – choking out other plants and providing no ecological benefit – and should be controlled.

    The thing that’s been trending lately is clover lawns. Clover attracts bees, it doesn’t require as much maintenance, it’s drought tolerant, etc. So I gave it a shot. I didn’t kill my lawn, but I heavily seeded all the bare spots and overseeded the lawn in general with white and crimson clover, as well as with dichondra. My hope was that it would fill in the spaces, outcompete some of the invasive weeds, and bring more bees to my garden overall.

    When it was all said and done, I hated it.

    First of all, I think the folks on social media who claim they love their clover lawns, are lying. Clover is great as part of your lawn, but as the singular element? Absolutely not. If there’s not enough sunlight it gets leggy, it falls over when it rains too hard or you walk on it, and it dies back easily and often leaving you with bare soil primed for some of the more vigorous and invasive weeds we have in Louisiana.

    This leads to two question: 1) why not let the regular, volunteer weeds just do their thing instead of trying to be in control? and 2) wasn’t the point of killing the lawn to reintroduce native species?

    Most of the regular “weeds” in my area get really tall and grow faster than the grass. I have two dogs and there’s a colony of feral cats in the neighborhood. I do not enjoy easter egg hunting for animal poop. And if I don’t regularly locate it all, the dogs will eat the cat poop, they’ll step in their own poop and track it inside, and the fly population will be out of control. So if my original reasons for killing the lawn included having to mow less, then this doesn’t hold up – I’d still be out there with the string trimmer at least once a week.

    On the other hand, intentionally planting native species in a yard this size is firstly, cost prohibitive. More importantly, it still doesn’t solve the poop problem as most native grasses and wildflowers are also tall. Louisiana doesn’t have many species of native ground cover that are commercially available (e.g. turkey tangle frogfruit), and the more available low-growing natives are still 5 – 6 inches in height.

    But whether I leave the regular weeds or plant native species, the seasonality is always gonna whoop my ass. Most of these plants die back to the ground in between seasons rather than just going dormant. They come back up the next year, but in the interim I’m left with random balding patches of weakly rooted and thinning plants, or straight up bare soil. With clay-based soil and a cyclical flood/drought weather pattern, the clay goes through extreme expansion and contraction when it’s left exposed leading to erosion, mud pits, and sinking structures.

    One summer we had a drought for the first half and endless storming the second half. By the end of the year, my cinderblock raised beds had shifted to the point that I had to rebuild them, and my arbor started leaning to one side where the cement footings on the right pillars sunk deeper, pulling the left ones up. Most recently, so much soil washed away in the back half of my yard that it exposed a buried cement pad I never knew was there (and didn’t want). The overall patchiness and lack of health throughout the lawn makes it a prime breeding ground for red ants, which is a nightmare for both me and the dogs.

    So after 7 years of playing this game, I ordered a pallet of sod from a local company.

    I didn’t kill the weeds, I just trimmed certain patches down to the dirt, raked up as many roots as I could, dug up soil when necessary to meet grade, and added some topsoil. I left the major sections of clover in my lawn where it plays nicely in between the St. Aug grass blades, but I pulled up much of the fast spreading seasonal weeds to give the grass space to breathe and spread. I’m not aiming for a perfect, weed-free, monocultural lawn, but I needed to find a better balance between how I actually use my yard and how I can support the ecosystem.

    I’ve shrunk the overall size of my lawn by at least 40% in my decade of homeownership. Every year the trees get bigger, I expand my food plots, and add more native plants in garden beds. But the reality is, I will always want comfortable spaces in the yard to lounge and for the dogs to play. For those spaces, I’m sticking with the sod. When the turf grass is healthy, with fewer weeds, I don’t pull out the mower or trimmer as often because the grass doesn’t grow tall very quickly and it goes dormant for most of fall/winter. I use fewer pesticides as well.

    “Kill your lawn” is a great rallying cry for individual homeowners to get behind for combatting climate change and ecocide. But it isn’t always as straightforward as pulling up the whole lawn and planting a native prairie (or another monocultural space via clover). As you contemplate what to do with your outdoor space, always be realistic with yourself about how you currently use the yard and how you hope to use the yard.

    • If you have small children or animals, or you do outdoor sports/activities you’re going to want to have some dedicated low growing areas, able to withstand high traffic, and maybe doesn’t attract stinging insects or snakes.
    • If you want to grow food you might build raised beds on top of the grass (which would kill it) or dig up the grass and plant rows in-ground with plenty of additional mulch.
    • If you want flowers and other ornamental plants, you might have dedicated garden beds that are contained to a certain location that can be expanded.

    The point is, being considerate of the ecosystem and biodiversity doesn’t have to be all or nothing. Kill the lawn in sections based on your personal usage (as I’ve done) or, if you have the right financial and life circumstances, go for the prairie-like yard full of wildflowers and other native plants and marvel in the habitat you’ve created. Whatever you decide, make sure you create a space you can enjoy and not a space you create out of obligation. There’s no perfect way to respect the environment, and whatever you build, nature will eventually show up.